Set up zsh command line in MacOS
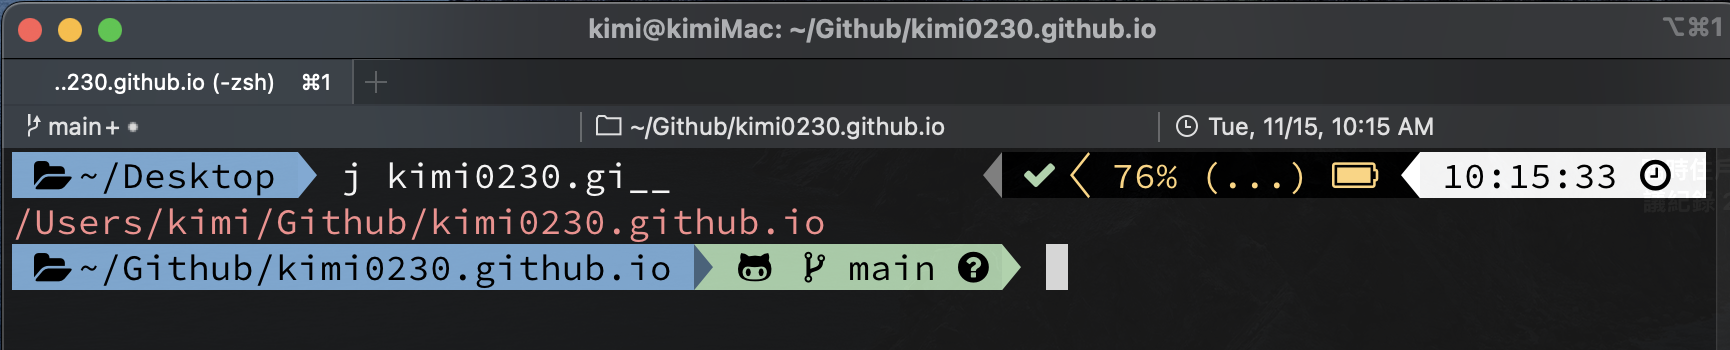
ZSH
 https://github.com/ohmyzsh/ohmyzsh
- 安裝 oh-my-zsh
- 安裝 zsh theme: powerlevel9k
- 設定 powerlevel9k
1. 安裝 iTerm2
# 如果你從來沒有用過 brew cask 的話需要先跑這行
brew tap caskroom/cask
# 安裝 iTerm2
brew cask instal iterm2
2. 修改 iTerm2 的 color scheme
將 Report Terminal Type 設為 xterm-256color, 才有顏色
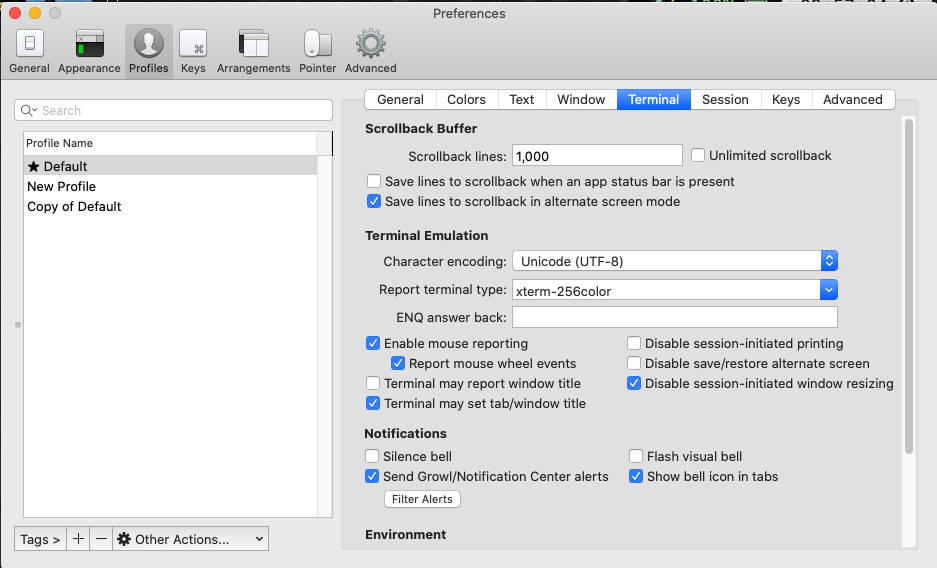
設定路徑:Preferences > Profiles > Colors > Color Presets
內建不是很好看可以到
mbadolato/iTerm2-Color-Schemes clone repo. 然後到此設定選 import 到 iTerm2
Status Bar Component
https://iterm2.com/python-api/examples/statusbar.html
references > Profiles > Session. 打開 Status Bar Enabled 選擇 Configure Status Bar.
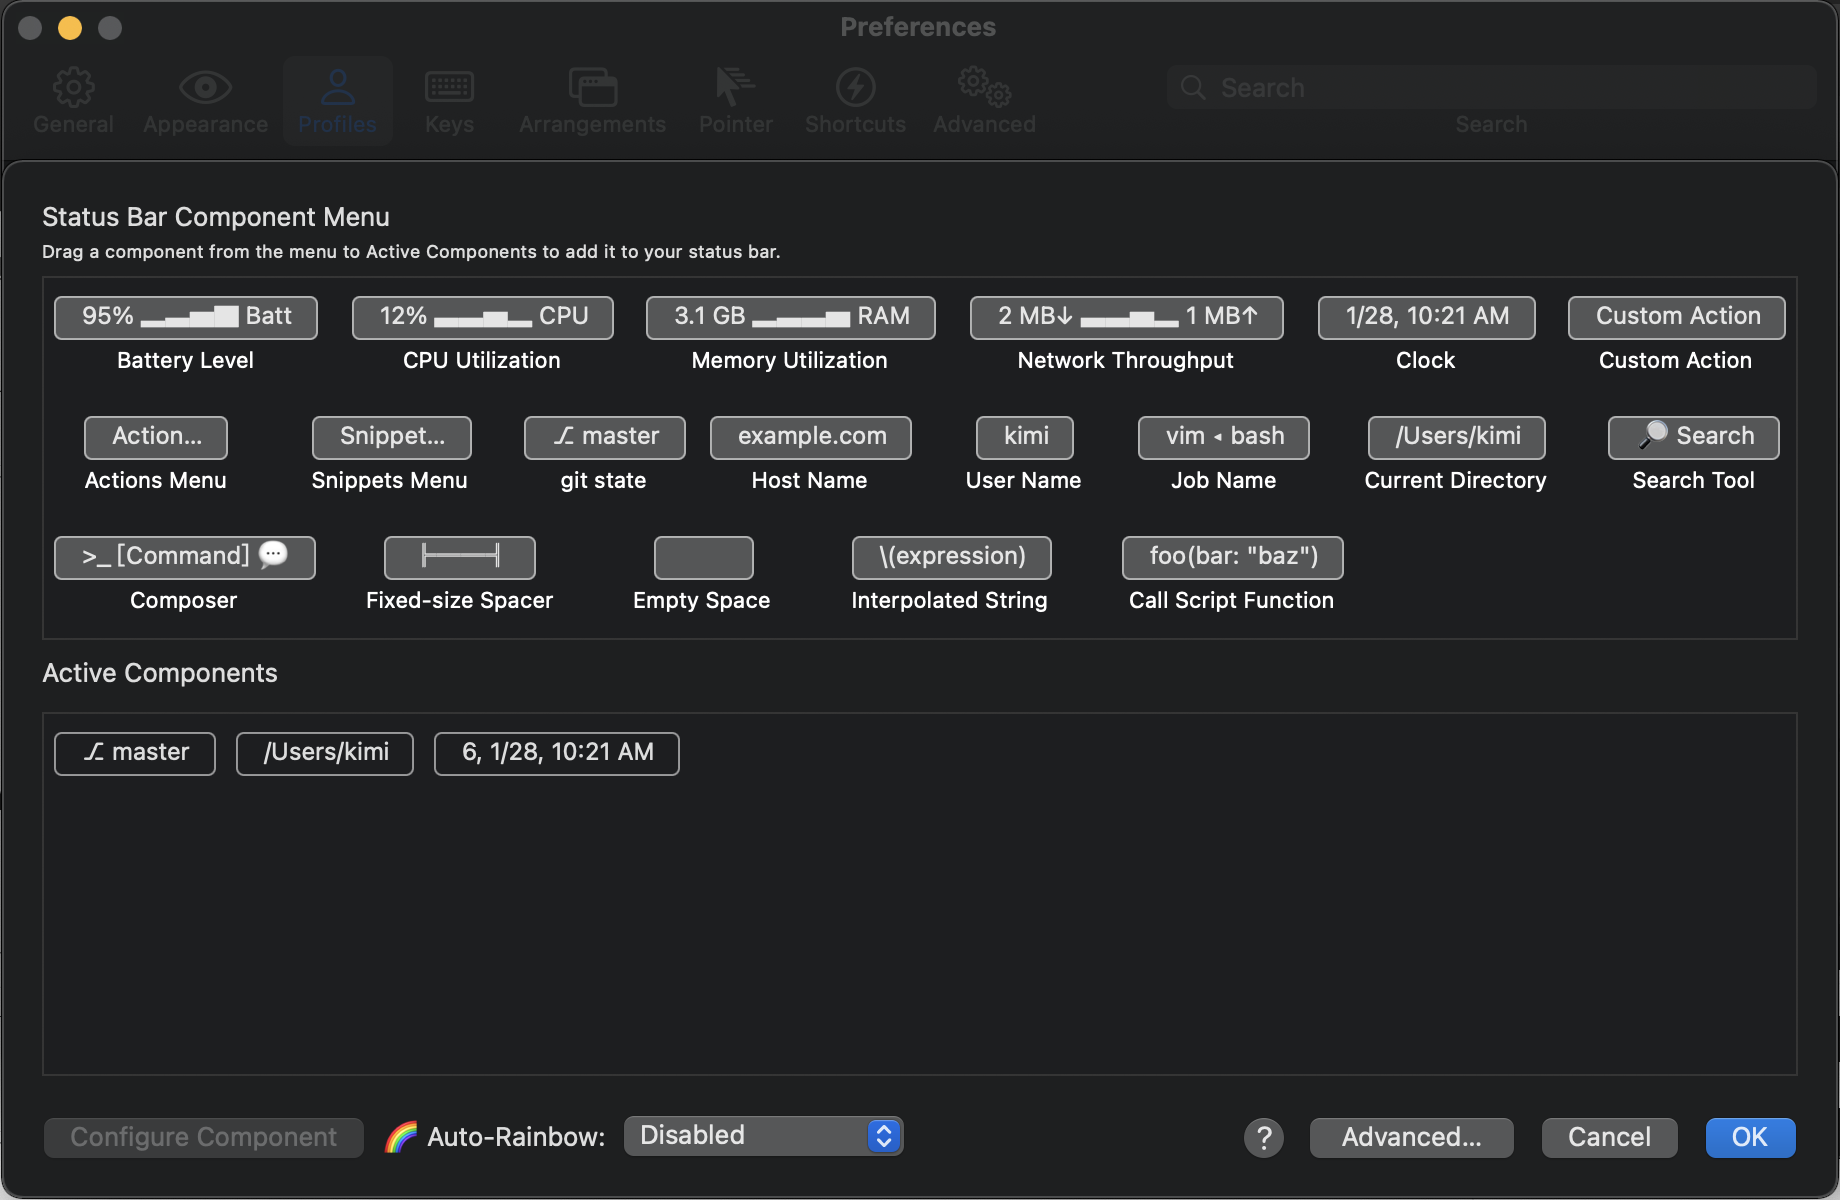
其他設定
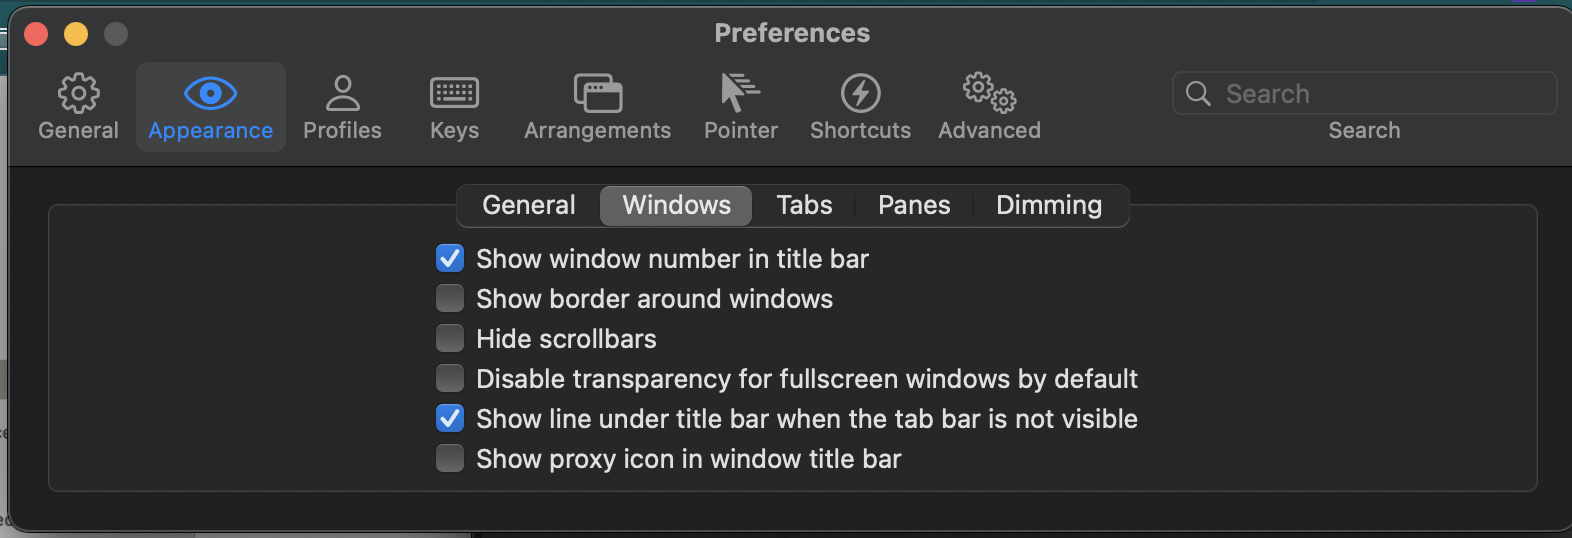
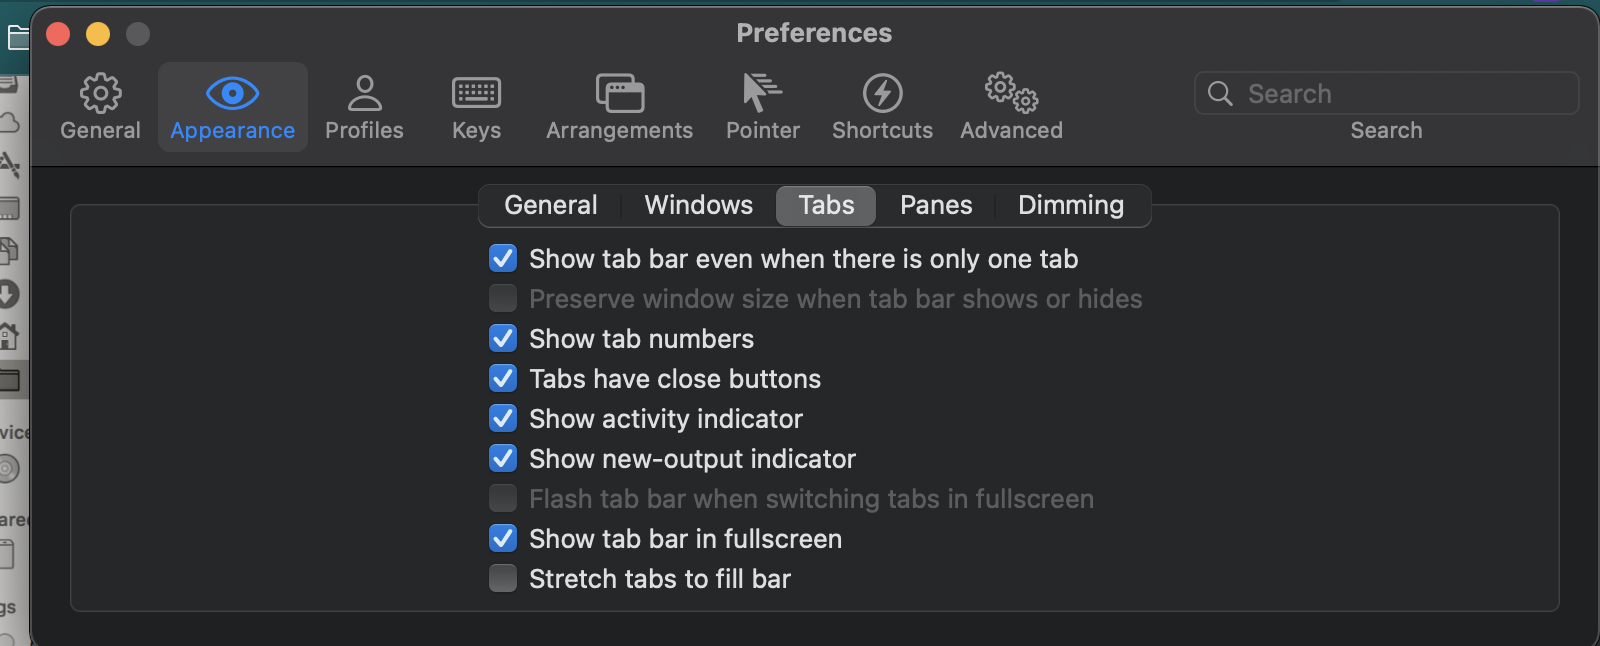
3. 安裝 powerline font
避免某些主題的icon變成框框問號, 所以需此font
# 先執行這行,才能用 homebrew 安裝字型。曾經執行過的人可以跳過這個指令
brew tap caskroom/fonts
# 安裝指令
brew cask install font-sourcecodepro-nerd-font
如果想要裝別的,brew 上面也有很多字型可以挑。
關鍵字是 nerd:
brew cask search nerd
裝完後要在設定路徑Preferences > Profiles > Text > Change Font 選擇字型
4. 安裝 zsh
homebrew 安裝:
brew install zsh
並把 zsh 設定為你的預設 shell:
sudo sh -c "echo $(which zsh) >> /etc/shells"
chsh -s $(which zsh)
之後再重開 iterm2 就會生效了
5. 安裝 oh-my-zsh
sh -c "$(curl -fsSL https://raw.githubusercontent.com/robbyrussell/oh-my-zsh/master/tools/install.sh)"
執行完以後如果沒有出現什麼錯誤訊息就代表成功了,同時會發現多了 oh-my-zsh 的資料夾 ~/.oh-my-zsh
6. 安裝zsh theme: powerlevel9k
可以在iterm2上面顯示更多資訊 像是時間, 電池等等
git clone https://github.com/bhilburn/powerlevel9k.git ~/.oh-my-zsh/custom/themes/powerlevel9k
編輯你的 ~/.zshrc ,把 ZSH_THEME 設為 powerlevel9k
ZSH_THEME="powerlevel9k/powerlevel9k"
# command line 左邊想顯示的內容
POWERLEVEL9K_LEFT_PROMPT_ELEMENTS=(context dir dir_writable vcs) # <= left prompt 設了 "dir"
# command line 右邊想顯示的內容
POWERLEVEL9K_RIGHT_PROMPT_ELEMENTS=(status battery time) # <= right prompt 設了 "time"
DEFAULT_USER="kimi"
POWERLEVEL9K_MODE='nerdfont-complete' #  git 資訊多顯示了幾個 icon
ZSH_DISABLE_COMPFIX=true
執行 exec $SHELL,設定才會生效
GitHub: https://github.com/Powerlevel9k/powerlevel9k#available-prompt-segments
Plugin
- autojump
- 可以用指令 j 跳到所指地的資料夾, 這樣就不用一直cd..
- https://github.com/wting/autojump
- zsh-autosuggestions
My file
vi ~/.zshrc
# Path to your oh-my-zsh installation.
export ZSH="/Users/kimi/.oh-my-zsh"

# Set name of the theme to load --- if set to "random", it will
# load a random theme each time oh-my-zsh is loaded, in which case,
# to know which specific one was loaded, run: echo $RANDOM_THEME
# See https://github.com/robbyrussell/oh-my-zsh/wiki/Themes
# ZSH_THEME="robbyrussell"
# ZSH_THEME="agnoster"
ZSH_THEME="powerlevel9k/powerlevel9k"
# command line 左邊想顯示的內容
POWERLEVEL9K_LEFT_PROMPT_ELEMENTS=(context dir dir_writable vcs) # <= left prompt 設了 "dir"
# command line 右邊想顯示的內容
POWERLEVEL9K_RIGHT_PROMPT_ELEMENTS=(status battery time) # <= right prompt 設了 "time"
POWERLEVEL9K_MODE='nerdfont-complete' #  git 資訊多顯示了幾個 icon
DEFAULT_USER="kimi"
ZSH_DISABLE_COMPFIX="true"

# Set list of themes to pick from when loading at random
# Setting this variable when ZSH_THEME=random will cause zsh to load
# a theme from this variable instead of looking in ~/.oh-my-zsh/themes/
# If set to an empty array, this variable will have no effect.
# ZSH_THEME_RANDOM_CANDIDATES=( "robbyrussell" "agnoster" )

# Uncomment the following line to use case-sensitive completion.
# CASE_SENSITIVE="true"

# Uncomment the following line to use hyphen-insensitive completion.
# Case-sensitive completion must be off. _ and - will be interchangeable.
# HYPHEN_INSENSITIVE="true"

# Uncomment the following line to disable bi-weekly auto-update checks.
# DISABLE_AUTO_UPDATE="true"

# Uncomment the following line to change how often to auto-update (in days).
# export UPDATE_ZSH_DAYS=13

# Uncomment the following line to disable colors in ls.
# DISABLE_LS_COLORS="true"

# Uncomment the following line to disable auto-setting terminal title.
# DISABLE_AUTO_TITLE="true"

# Uncomment the following line to enable command auto-correction.
# ENABLE_CORRECTION="true"

# Uncomment the following line to display red dots whilst waiting for completion.
# COMPLETION_WAITING_DOTS="true"

# Uncomment the following line if you want to disable marking untracked files
# under VCS as dirty. This makes repository status check for large repositories
# much, much faster.
# DISABLE_UNTRACKED_FILES_DIRTY="true"

# Uncomment the following line if you want to change the command execution time
# stamp shown in the history command output.
# You can set one of the optional three formats:
# "mm/dd/yyyy"|"dd.mm.yyyy"|"yyyy-mm-dd"
# or set a custom format using the strftime function format specifications,
# see 'man strftime' for details.
# HIST_STAMPS="mm/dd/yyyy"

# Would you like to use another custom folder than $ZSH/custom?
# ZSH_CUSTOM=/path/to/new-custom-folder

# Which plugins would you like to load?
# Standard plugins can be found in ~/.oh-my-zsh/plugins/*
# Custom plugins may be added to ~/.oh-my-zsh/custom/plugins/
# Example format: plugins=(rails git textmate ruby lighthouse)
# Add wisely, as too many plugins slow down shell startup.

plugins=(
  git autojump zsh-autosuggestions
)

source $ZSH/oh-my-zsh.sh

# User configuration

# export MANPATH="/usr/local/man:$MANPATH"

# You may need to manually set your language environment
# export LANG=en_US.UTF-8

# Preferred editor for local and remote sessions
# if [[ -n $SSH_CONNECTION ]]; then
#   export EDITOR='vim'
# else
#   export EDITOR='mvim'
# fi

# Compilation flags
# export ARCHFLAGS="-arch x86_64"

# ssh
# export SSH_KEY_PATH="~/.ssh/rsa_id"

# Set personal aliases, overriding those provided by oh-my-zsh libs,
# plugins, and themes. Aliases can be placed here, though oh-my-zsh
# users are encouraged to define aliases within the ZSH_CUSTOM folder.
# For a full list of active aliases, run `alias`.
#
# Example aliases
# alias zshconfig="mate ~/.zshrc"
# alias ohmyzsh="mate ~/.oh-my-zsh"

# iterm2 連接linux 顯示中文
export LC_ALL=en_US.UTF-8
export LANG=en_US.UTF-8

# go path
export GOBIN=$HOME/go/bin
export PATH=$PATH:/usr/local/go/bin:$GOBIN
export GOPATH=$HOME/go

# mysql path
export PATH=${PATH}:/usr/local/mysql/bin

# calibre 電子書
export EBOOK_PATH=/Applications/calibre.app/Contents/MacOS
export PATH=$PATH:$EBOOK_PATH

# The next line updates PATH for the Google Cloud SDK.
if [ -f '/Users/kimi/google-cloud-sdk/path.zsh.inc' ]; then . '/Users/kimi/google-cloud-sdk/path.zsh.inc'; fi

# The next line enables shell command completion for gcloud.
if [ -f '/Users/kimi/google-cloud-sdk/completion.zsh.inc' ]; then . '/Users/kimi/google-cloud-sdk/completion.zsh.inc'; fi

# >>> conda initialize >>>
# !! Contents within this block are managed by 'conda init' !!

__conda_setup="$('/Users/kimi/opt/anaconda3/bin/conda' 'shell.zsh' 'hook' 2> /dev/null)"
if [ $? -eq 0 ]; then
    eval "$__conda_setup"
else
    if [ -f "/Users/kimi/opt/anaconda3/etc/profile.d/conda.sh" ]; then
        . "/Users/kimi/opt/anaconda3/etc/profile.d/conda.sh"
    else
        export PATH="/Users/kimi/opt/anaconda3/bin:$PATH"
    fi
fi
unset __conda_setup
# <<< conda initialize <<<

export PATH="/usr/local/opt/php@7.4/bin:$PATH"
export PATH="/usr/local/opt/php@7.4/sbin:$PATH"
vimrc
git clone --depth=1 https://github.com/amix/vimrc.git ~/.vim_runtime
sh ~/.vim_runtime/install_awesome_vimrc.sh