Windows WinGet
https://github.com/microsoft/winget-cli#sources
2020年5月,Microsoft Build開發者大會上首次宣布了Windows Package Manager
Package Manager
- Windows
- Winget
- Chocolatety (third-party)
- Scoop (third-party)
- MacOS
- Homebrew (third-party)
- Ubuntu
- apt-get
- CentOS
- yum
- FreeBSD
- pkg
- Red Hat Linux
- RPM
Winget vs Chocolatey vs Scoop
| - | Winget | Chocolatey | Scoop | AppGet |
|---|---|---|---|---|
| Manifests | YAML | JSON | JSON | YAML |
| OS | Windows 10 1709, 11 | Windows 7 | Windows7 | - |
| PowerShell | v2 | v3 | ||
| GUI | ✓ | |||
| Wiki | Link | Link | - | - |
| Github | Link | Link | Link | Link |
AppGet
- shut down on August 1st, 2020
- The Day AppGet Died
使用 winget 工具來安裝和管理應用程式
Install WinGet
https://docs.microsoft.com/zh-tw/windows/package-manager/winget/
根據預設,Windows 封裝管理員 winget命令列工具會與Windows 11和新式版本的 Windows 10 搭配使用,作為應用程式安裝程式。
如果您執行的是舊版 Windows 且未安裝應用程式安裝程式,您可以從 Microsoft Store 取得應用程式安裝程式。 如果已安裝,請確定已安裝最新版本。
應用程式安裝套裝程式含 winget 工具的生產版本。
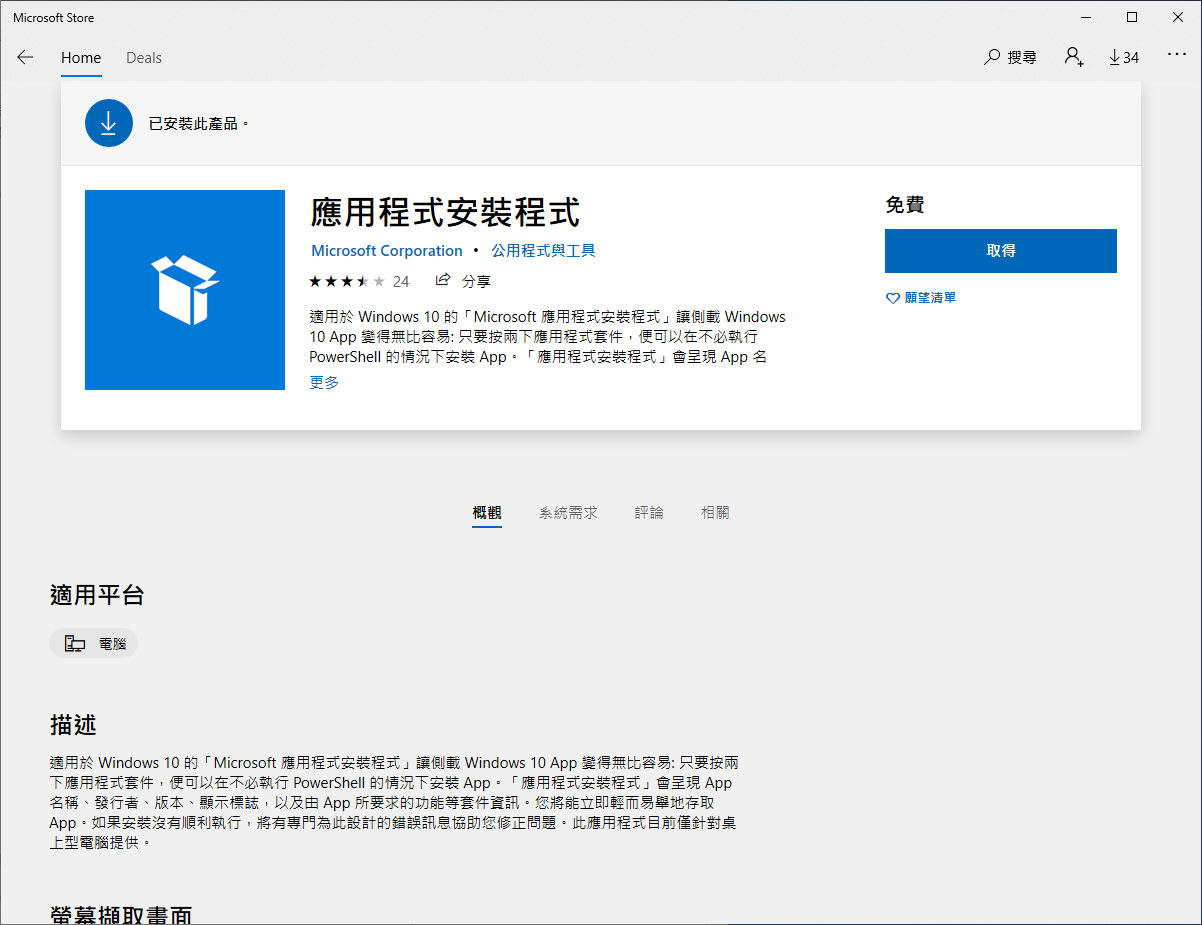
注意 目前只有Windows 10 1709 (組建 16299) 或更新版本才支援winget命令列工具。
Use winget
安裝應用程式安裝程式之後,您可以在命令提示字元中輸入 'winget' 來執行 winget。
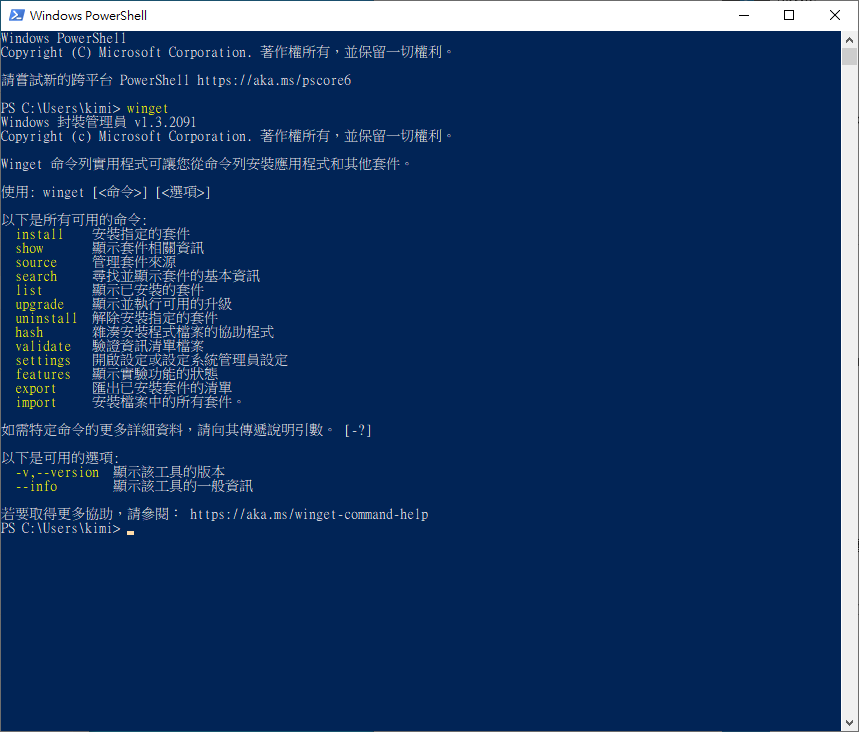
其中一個最常見的使用案例是搜尋並安裝最愛的工具。
若要搜尋工具,請輸入 winget search <appname>
Common commands
winget                      # 顯示幫助文檔,同【winget -?】或【winget --help】
winget xxx -?               # 顯示指定命令的幫助文檔
winget settings             # 使用默認文本編輯器打開配置文件

winget list > list.txt      # 導出系統上已安裝的應用(包括不是通過winget安裝的應用)
winget list LINE         # 篩選與指定內容匹配(名稱、id、tags、描述、作者...)的應用
winget list --name LINE       # 篩選名稱與指定內容匹配的應用
winget list --id winget list --id 7zip.7zip    # 篩選 id 中包含指定內容的應用(不區分大小寫)

winget show LINE              # 顯示與指定內容匹配的應用的詳細信息
winget show "Android Studio"    # 帶空格時必須用引號包起來
winget show LINE --versions   # 顯示應用程序的所有可用版本

winget export -o apps.json      # 以JSON格式導出已安裝的應用(僅包含源中能匹配的應用)
winget import -i apps.json      # 批量安裝通過export導出的應用(安裝的是最新版本)

winget search Tencent                  # 搜索與指定內容匹配的應用
winget search --id Tencent             # 搜索 id 中包含指定內容的應用
winget search Tencent -s winget -e     # 在指定源中、使用確切的字符串(區分大小寫)搜索匹配的應用

winget install LINE                  # 安裝與指定內容匹配的應用,僅當匹配應用唯一的時候才可以安裝
winget install --id LINE.LINE    # 安裝指定 id 應用的最新版本(id必須是完全一致的)
winget install --id xxx --version yyy  # 安裝指定 id 應用的特定版本

winget upgrade xxx --version yyy       # 將與指定內容匹配的應用(建議使用--id精準匹配)升級到特定版本
winget upgrade --all                   # 升級所有應用到最新版本
winget uninstall --id xxx              # 卸載指定 id 的應用(不是通過winget安裝的應用也可以卸載)

winget source list                     # 列出已啟用的軟件源(winget、msstore)
winget source list --name winget       # 獲取源的完整詳細信息
winget source update                   # 檢查更新,還有add、remove、reset、expor等子命令
search command
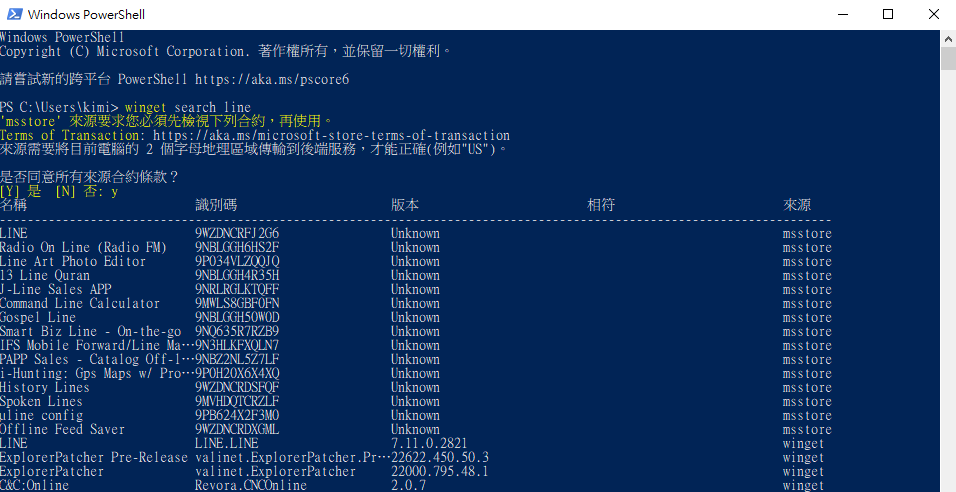
PS C:\Users\kimi> winget search line
'msstore' 來源要求您必須先檢視下列合約,再使用。
Terms of Transaction: https://aka.ms/microsoft-store-terms-of-transaction
來源需要將目前電腦的 2 個字母地理區域傳輸到後端服務,才能正確(例如"US")。

是否同意所有來源合約條款?
[Y] 是  [N] 否: y
名稱                        識別碼                      版本                        相符                        來源
-----------------------------------------------------------------------------------------------------------------------
LINE                        9WZDNCRFJ2G6                Unknown                                                 msstore
...
Radio On Line (Radio FM)    9NBLGGH6HS2F                Unknown                                                 msstore
Line Art Photo Editor       9P034VLZQQJQ                Unknown                                                 msstore
...
µline config                9PB624X2F3M0                Unknown                                                 msstore
Offline Feed Saver          9WZDNCRDXGML                Unknown                                                 msstore
LINE                        LINE.LINE                   7.11.0.2821                                             winget
...
install command
使用: winget install [[-q] <query>] [<選項>]

以下是可用的引數:
  -q,--query                   用來搜尋套件的查詢

以下是可用的選項:
  -m,--manifest                套件資訊清單的路徑
  --id                         依識別碼篩選結果
  --name                       依名稱篩選結果
  --moniker                    依套件連結路徑來篩選結果
  -v,--version                 使用指定的版本; 預設為最新版本
  -s,--source                  使用指定的來源尋找套件
  --scope                      選取安裝範圍 (使用者或電腦)
  -a,--architecture            選取要安裝的架構
  -e,--exact                   以完全相符,來尋找套件
  -i,--interactive             要求互動式安裝; 可能需要使用者輸入
  -h,--silent                  要求無訊息安裝
  --locale                     要使用的地區設定 (BCP47 格式)
  -o,--log                     記錄位置 (如果有支援的話)
  --override                   覆寫要傳送到安裝程式的引數
  -l,--location                要安裝的位置 (如果有支援的話)
  --force                      覆寫安裝程式雜湊檢查
  --dependency-source          使用指定的來源尋找套件相依性
  --accept-package-agreements  接受套件的所有授權合約
  --header                     選用的 Windows-Package-Manager REST 來源 HTTP 標頭
  --accept-source-agreements   在來源作業期間接受所有來源合約
  -r,--rename                  對可執行檔 (可攜式) 重新命名的值

若要取得更多協助,請參閱: https://aka.ms/winget-command-install
example:
winget install --id 9WZDNCRFJ2G6
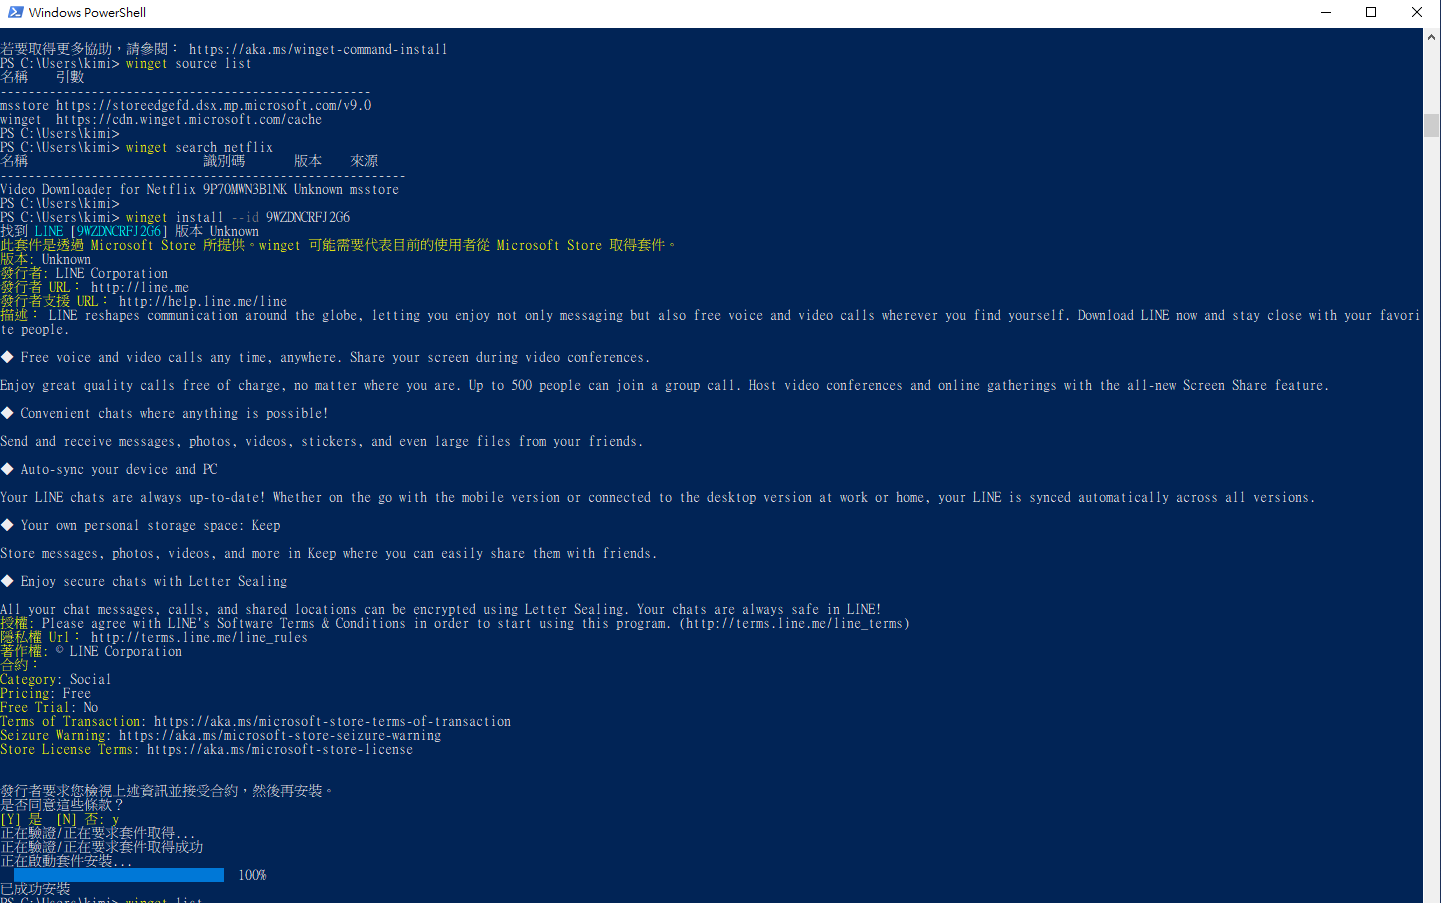
License Agreements 有些軟體安裝時會跳出許可同意, 如果要寫腳本的話可加上
--accept-package-agreements
install multiple packages
https://4sysops.com/archives/winget-install-multiple-apps/
Method 1 :
;winget install --source winget wechat ; winget install --source winget LINEMethod 2 :
import
If you already have some of the required programs installed on a machine, you can export this list to a JSON file:
winget export -o .\winget-export.json
clean it up and edit some packages you want.
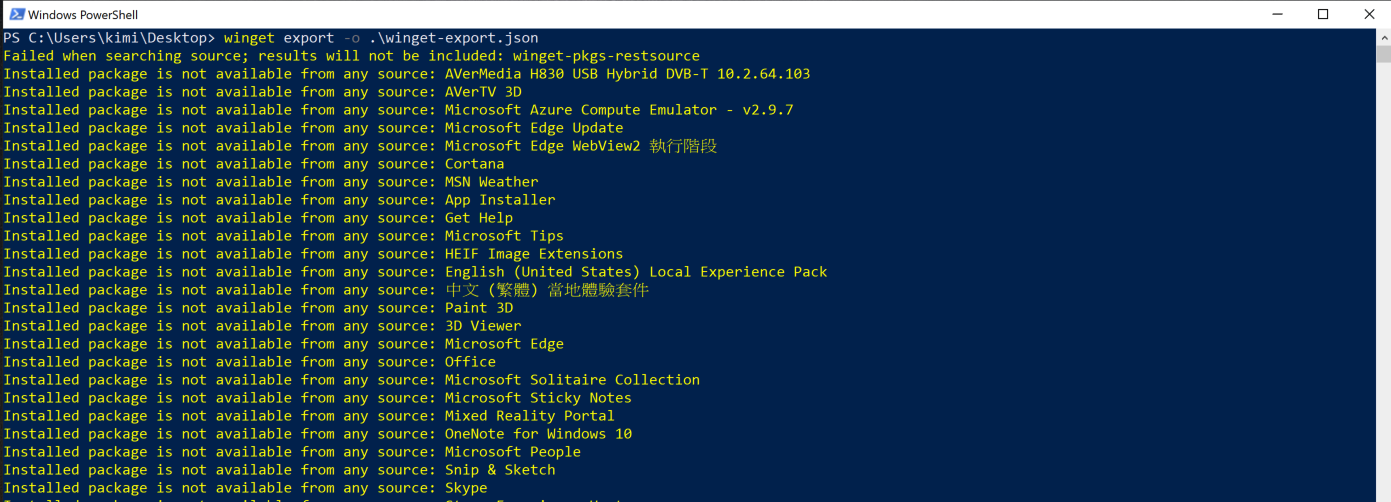
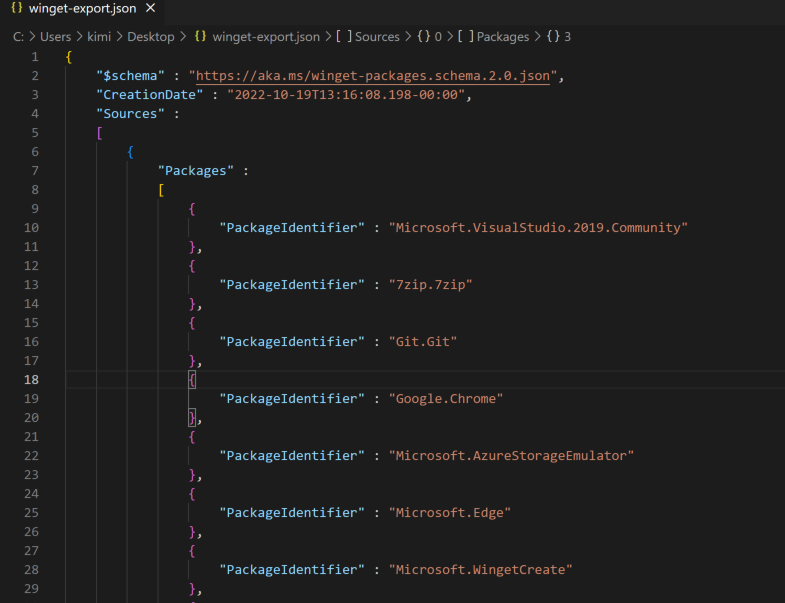
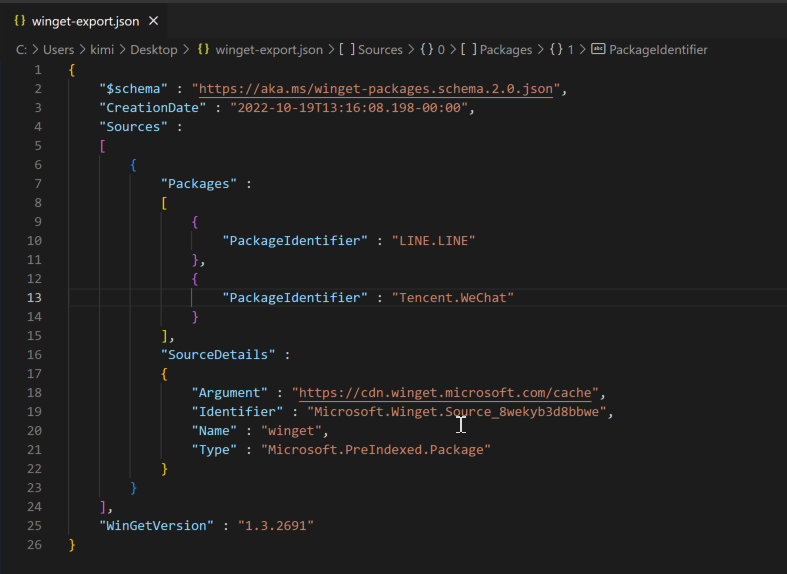
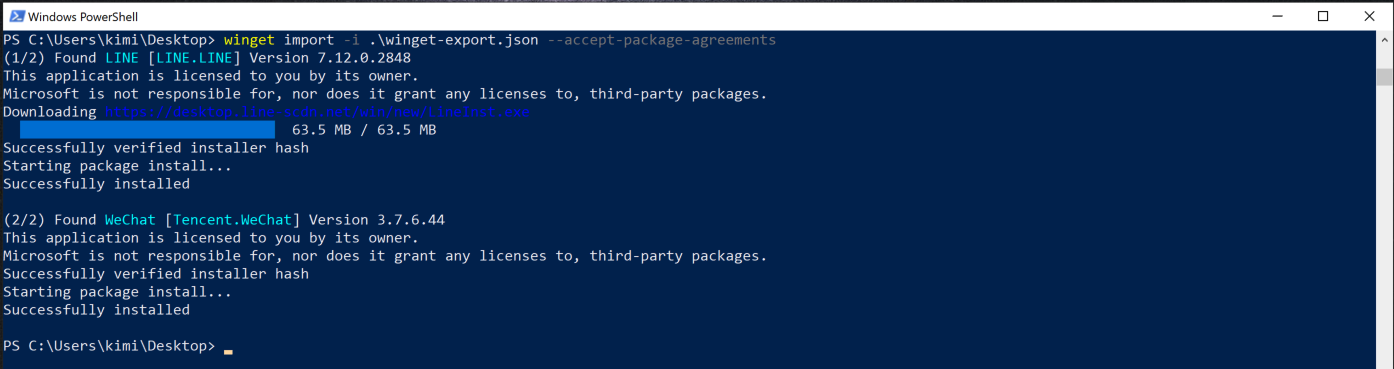
If the export file is in the desired state, you can transfer it to another computer and pass it to the import command there
winget import -i .\winget-export.json --accept-package-agreements
list command
winget list
PS C:\Users\kimi> winget list
名稱                                        識別碼                                         版本                可用           來源
-------------------------------------------------------------------------------------------------------------------------------------
7-Zip 19.00 (x64)                           7zip.7zip                                      19.00               22.01          winget
AVerMedia H830 USB Hybrid DVB-T 10.2.64.103 AVerMedia H830 USB Hybrid DVB-T                10.2.64.103
...
LINE                                        9WZDNCRFJ2G6                                   7.11.0.0
...
Microsoft OneDrive                          Microsoft.OneDrive                             22.176.0821.0003                   winget
版本更新, id (9WZDNCRFJ2G6) 不會變
PS C:\Users\kimi> winget list | Select-String "9WZDNCRFJ2G6"
LINE                                  9WZDNCRFJ2G6                           7.11.0.0                           msstore
Add third-party repository
source List
support : https://github.com/microsoft/winget-cli/issues/226 command : https://docs.microsoft.com/zh-tw/windows/package-manager/winget/source
PS C:\Users\kimi> winget source list
名稱    引數
-----------------------------------------------------
msstore https://storeedgefd.dsx.mp.microsoft.com/v9.0
winget  https://cdn.winget.microsoft.com/cache
PS C:\Users\kimi> winget source list
名稱    引數
-----------------------------------------------------
msstore https://storeedgefd.dsx.mp.microsoft.com/v9.0
winget  https://cdn.winget.microsoft.com/cache


PS C:\Users\kimi> winget source add --help
Windows 封裝管理員 v1.3.2091
Copyright (c) Microsoft Corporation. 著作權所有,並保留一切權利。

新增來源。來源會為您提供資料,以便您探索和安裝套件。只有在您信任其為安全位置時,才會新增來源。

使用: winget source add [-n] <name> [-a] <arg> [[-t] <type>] [<選項>]

以下是可用的引數:
  -n,--name                   來源的名稱
  -a,--arg                    指派給來源的引數
  -t,--type                   來源的類型

以下是可用的選項:
  --header                    選用的 Windows-Package-Manager REST 來源 HTTP 標頭
  --accept-source-agreements  在來源作業期間接受所有來源合約

若要取得更多協助,請參閱: https://aka.ms/winget-command-source
You can also simply throw some manifests on a fileshare and install them via:
PS C:\Users\kimi> winget install --manifest \\fileserver\share\packagerepo\manifests\mycompany\myapp\1.0.0.yaml
Manifest
WinGet 是通過讀取軟件對應的 Manifest 清單文件,才知道去哪裡尋找軟件、在哪下載軟件和如何安裝軟件的。 微軟官方目前維護了一個在 GitHub 上面開源的 microsoft/winget-pkgs 倉庫,用於讓 WinGet 來尋找軟件相應的 Manifest 文件。
Create your package manifest
您可以使用以下三種方式建立 manifest的 yaml 檔
- Windows Package Manager Manifest Creator
- YAMLCreate PowerShell 腳本
- 手動製作資訊清單
Manifest validation
當您將資訊清單提交至 GitHub 上的 https://github.com/microsoft/winget-pkgs repository時,系統會自動驗證您的資訊清單,並針對 Windows 生態系統的安全性進行評估。 您也可以手動檢查資訊清單。如需驗證程式的詳細資訊,請參閱Windows Package Manager validation process。
How to submit your manifest
若要將資訊清單提交至 repository,請遵循下列步驟。 https://learn.microsoft.com/en-us/windows/package-manager/package/repository#how-to-submit-your-manifest
Step 1: Validate your manifest
winget 工具會提供 validate 命令,確認您已正確建立資訊清單。 若要驗證您的資訊清單,請使用此命令。
winget validate \<path-to-the-manifests>
winget validate C:\Users\kimi\manifests\l\LINECorporation\LINE\7.12.0.2848

如果驗證失敗,請使用錯誤來尋找行號並進行更正。 驗證資訊清單之後,您就可以將其提交至存放庫。
Example:
PS C:\Users\kimi\Desktop\winget-pkgs> ls  .\manifests\l\LINE\LINE\7.11.0.2821\


    目錄: C:\Users\kimi\Desktop\winget-pkgs\manifests\l\LINE\LINE\7.11.0.2821


Mode                 LastWriteTime         Length Name
----                 -------------         ------ ----
-a----       2022/9/19  下午 01:47            860 LINE.LINE.installer.yaml
-a----       2022/9/19  下午 01:47           1201 LINE.LINE.locale.en-US.yaml
-a----       2022/9/19  下午 01:47            278 LINE.LINE.yaml


PS C:\Users\kimi\Desktop\winget-pkgs> winget validate .\manifests\l\LINE\LINE\7.11.0.2821\
資訊清單驗證成功。
注意: 路徑是指該資料夾
Step 2: Clone the repository
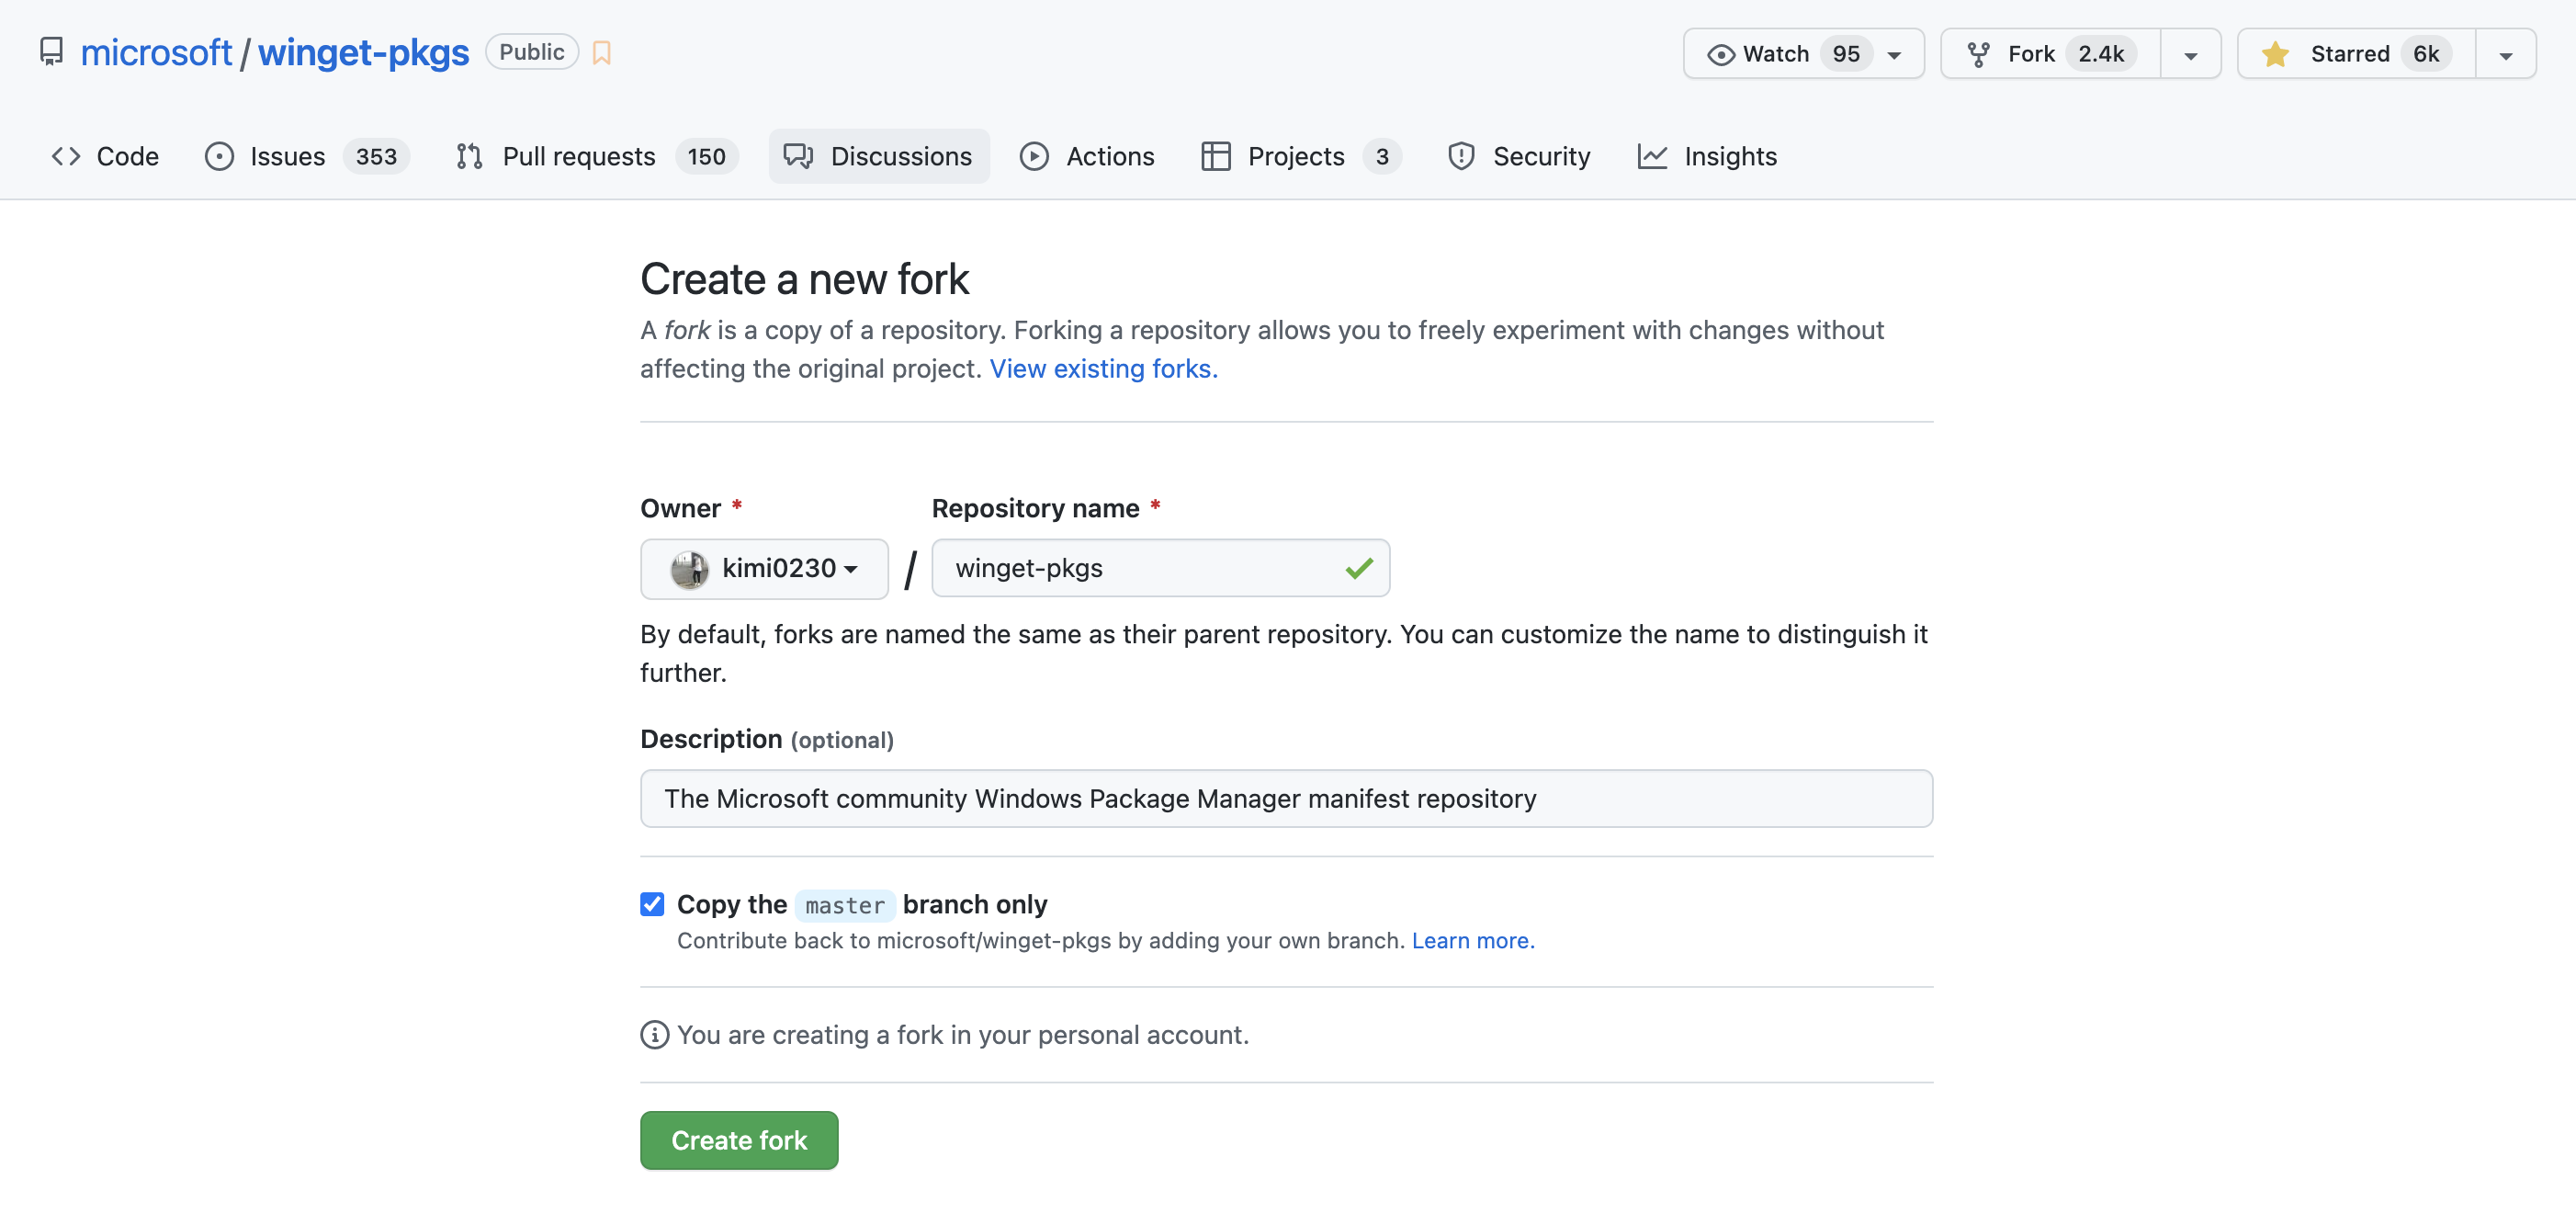
打開 https://github.com/microsoft/winget-pkgs ,然後按一下 Fork, 並 clone 你的Fork.
如果您要提交多次,請建立一個分支 (branch),而不是分叉 (fork)。 我們目前只允許每次提交一個資訊清單檔案。

Step 3: Add your manifest to the local repository
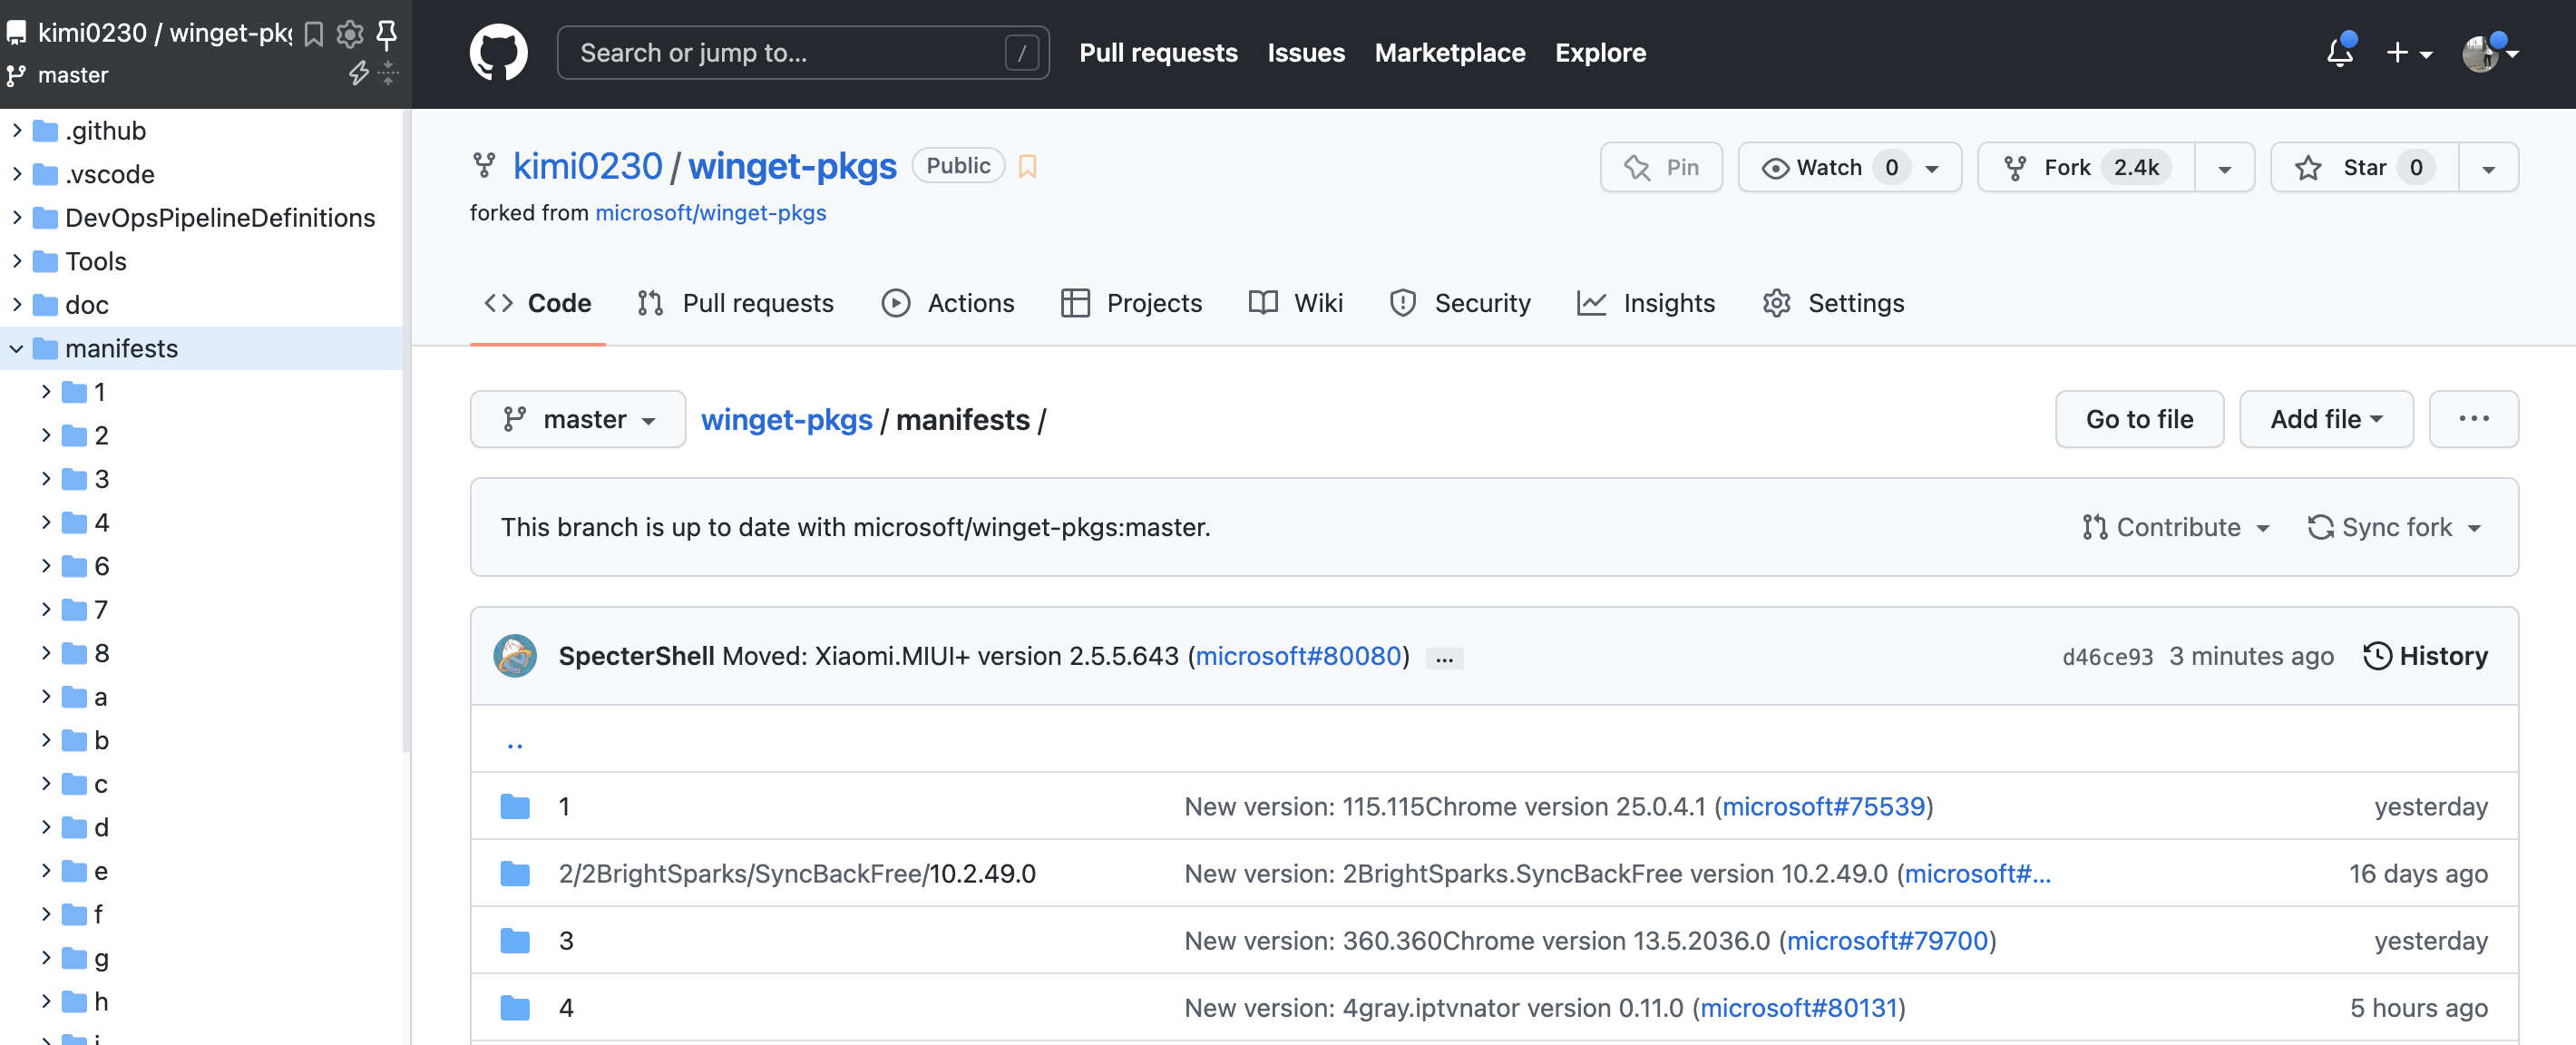
您必須將資訊清單檔案新增至下列資料夾結構中的存放庫:
manifests / letter / publisher / application / version
- The
manifestsfolder is the root folder for all manifests in the repository. - The
letterfolder is the first letter of the publisher name in the lower case. For example, m of the publisher Microsoft. - The
publisherfolder is the name of the company that publishes the software. For example, Microsoft. - The
applicationfolder is the name of the application or tool. For example, VSCode. - The
versionfolder is the version of the application or tool. For example, 1.0.0.
PackageIdentifier資訊清單中的 和 PackageVersion 值必須符合資訊清單資料夾路徑中的發行者、應用程式名稱和版本。 如需詳細資訊,請參閱Create your package manifest
Step 4: Submit your manifest to the remote repository
您現在已可以將新的資訊清單推送至遠端存放庫。
- commit使用 命令來新增檔案並認可變更,並提供提交的相關資訊。
git commit -m "Submitting ContosoApp version 1.0.0" --all
- 使用 push 命令將變更推送至遠端存放庫。
git push
Step 5: Create a pull request
推送變更之後,請返回 https://github.com/microsoft/winget-pkgs 並建立pull request,以將您的分叉 (fork) 或分支 (branch) 合併至主要分支。
Submission process
您建立pull request時,這會啟動自動化程式,以驗證資訊清單並驗證提取要求。 在此程式中,我們將針對安裝程式和已安裝的二進位檔執行測試,以驗證提交。
我們會將標籤新增至 您的提取要求 ,以便追蹤其進度。 如需標籤和程式的詳細資訊,請參閱Windows Package Manager validation.。
完成後,仲裁者(moderator)會手動檢閱您的提交,並在核准之後,您的應用程式會新增至Windows Package Manager catalog。
如果程式期間發生錯誤,您會收到通知,而我們的 labels 和 Bot 將協助您修正提交。 如需常見錯誤的清單,請參閱Windows Package Manager validation。
Host own WinGet
https://github.com/microsoft/winget-cli-restsource
Building the client
Prerequisites
- Git Large File Storage (LFS)
- Visual Studio 2019
- The following workloads:
- .NET desktop development
- Azure development
- ASP.NET and web development
- HTTPS
- Cosmos DB
- Clone repositories
- Need an Azure subscription
使用 Visual Studio 打開 https://github.com/microsoft/winget-cli-restsource/src\WinGet.RestSource.sln , 然後build.
Running locally
REST functions 可以在本地端運行, 但是如果要結合 winget的話, 必須使用 HTTPS. 這設定需要由 launchSettings.json 預先配置
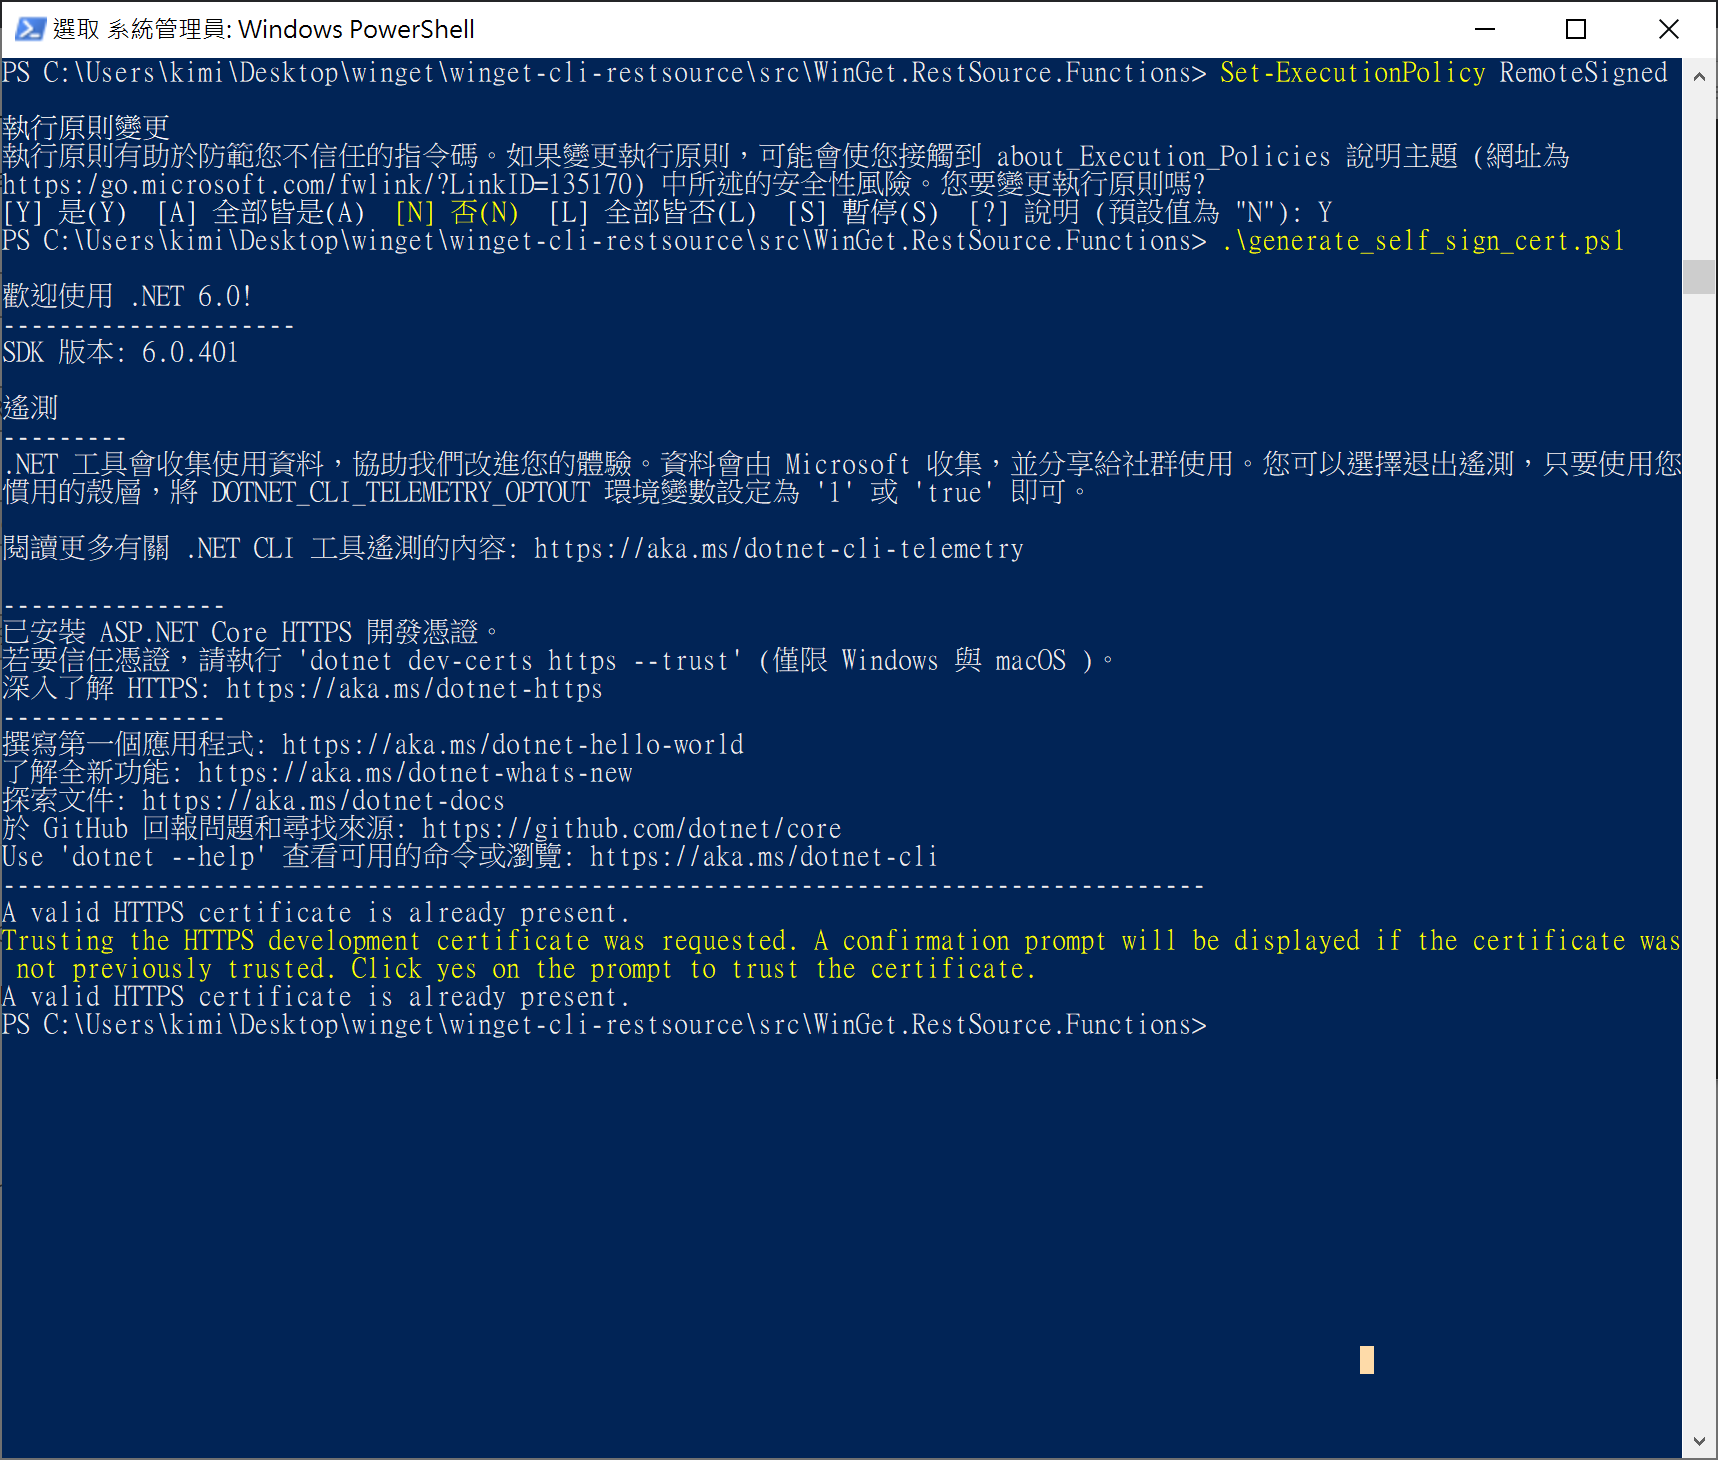
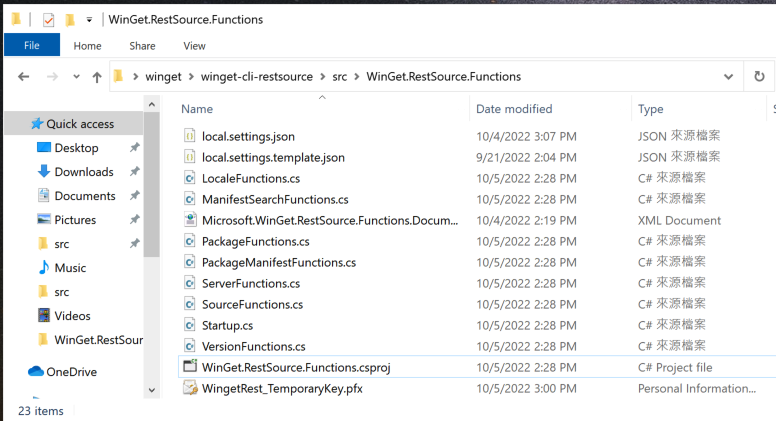
1. 使用 PowerShell 執行 src\WinGet.RestSource.Functions 下的 generate_self_sign_cert.ps1
- This will generate a test pfx and install it into the Root store.
- It will automatically be used as the HTTPS cert during local execution, thanks to launchSettings.json
2. Create a CosmosDB database instance in Azure, using either the above instructions, or manually.
- Navigate to the Keys section of your CosmosDB instance in the Azure portal to find your connection information.
- If you've used the ARM templates as described above, your Database will be named WinGet and your Collection will be Manifests
可參考 Azure Cosmos DB Emulator
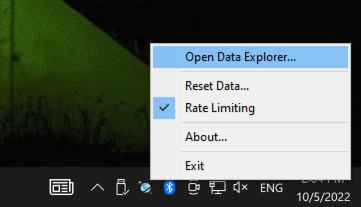
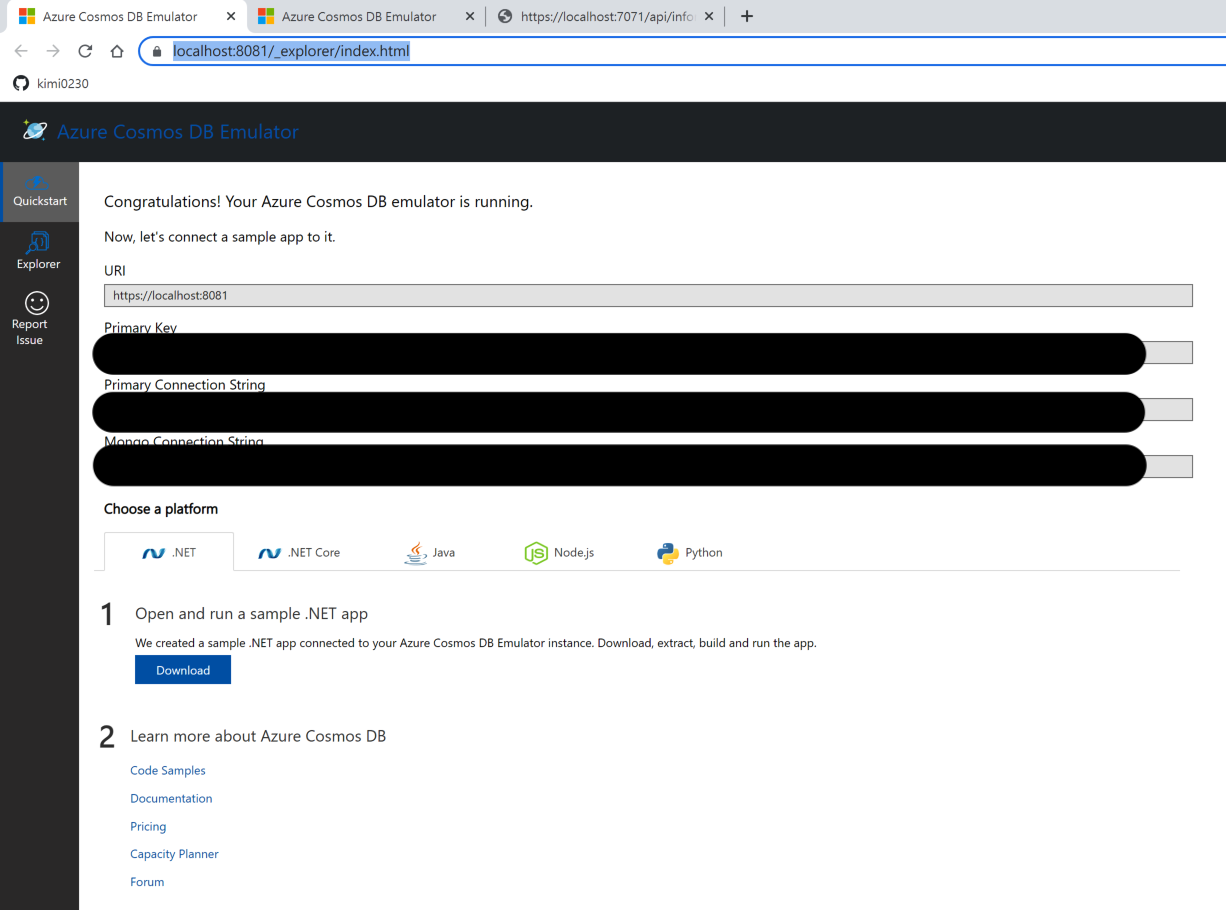
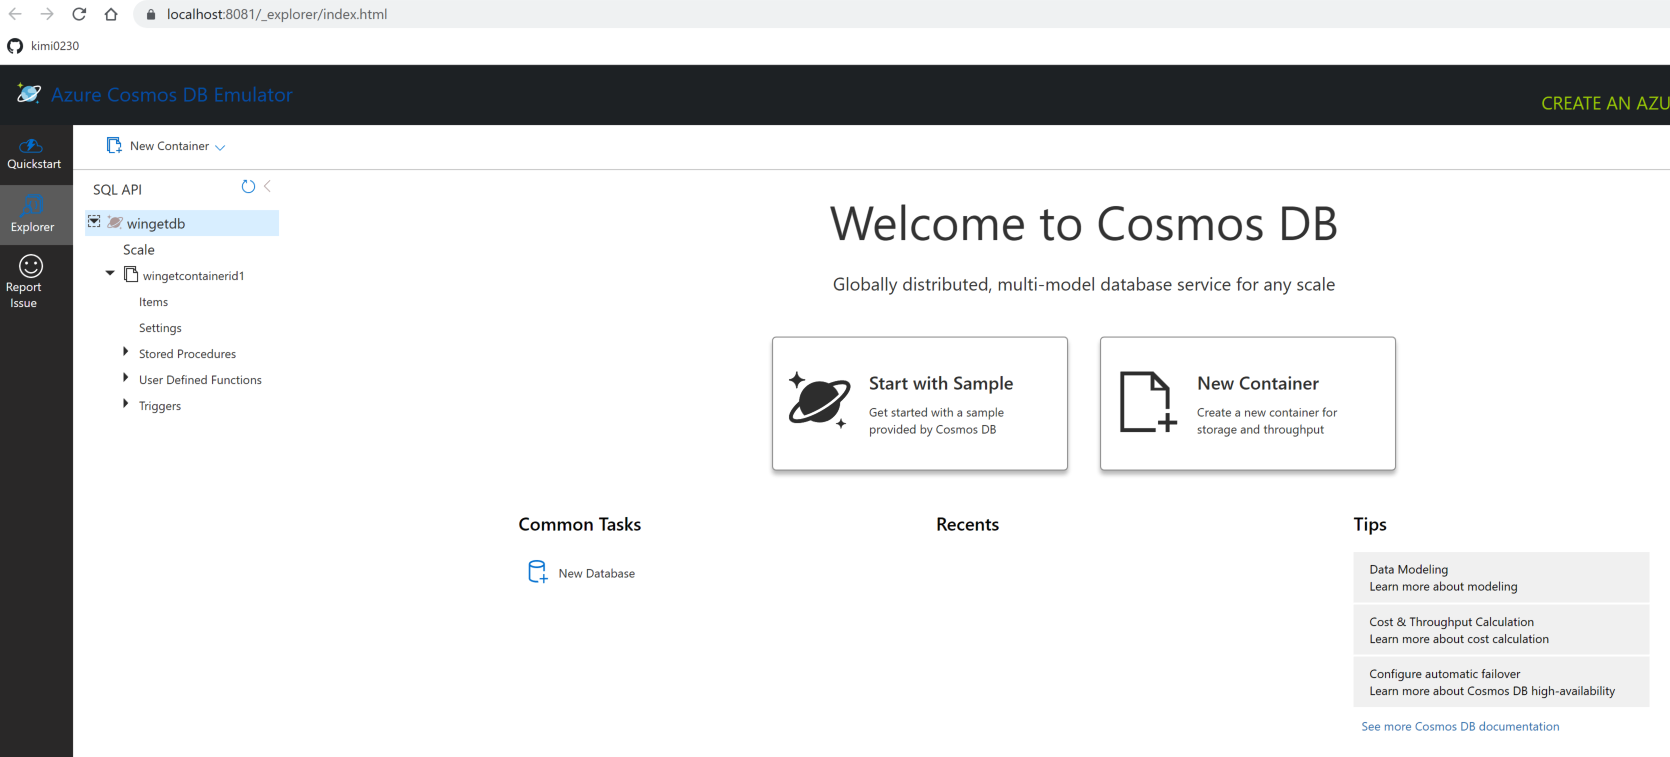
3. Copy
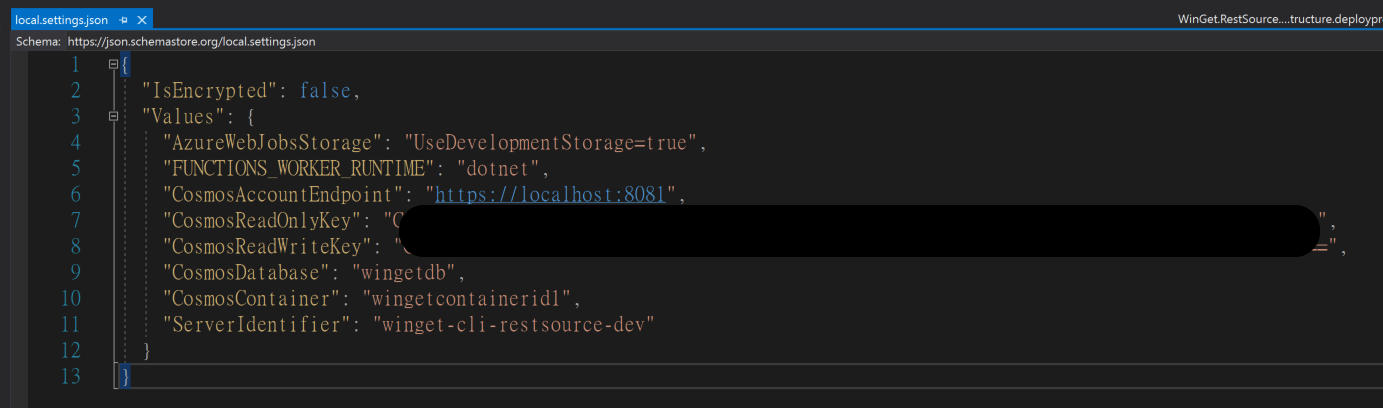
src\WinGet.RestSource.Functions\local.settings.template.jsontolocal.settings.jsonand populate required fields from the above Keys section. 如果沒做此步驟的話會出現下面錯誤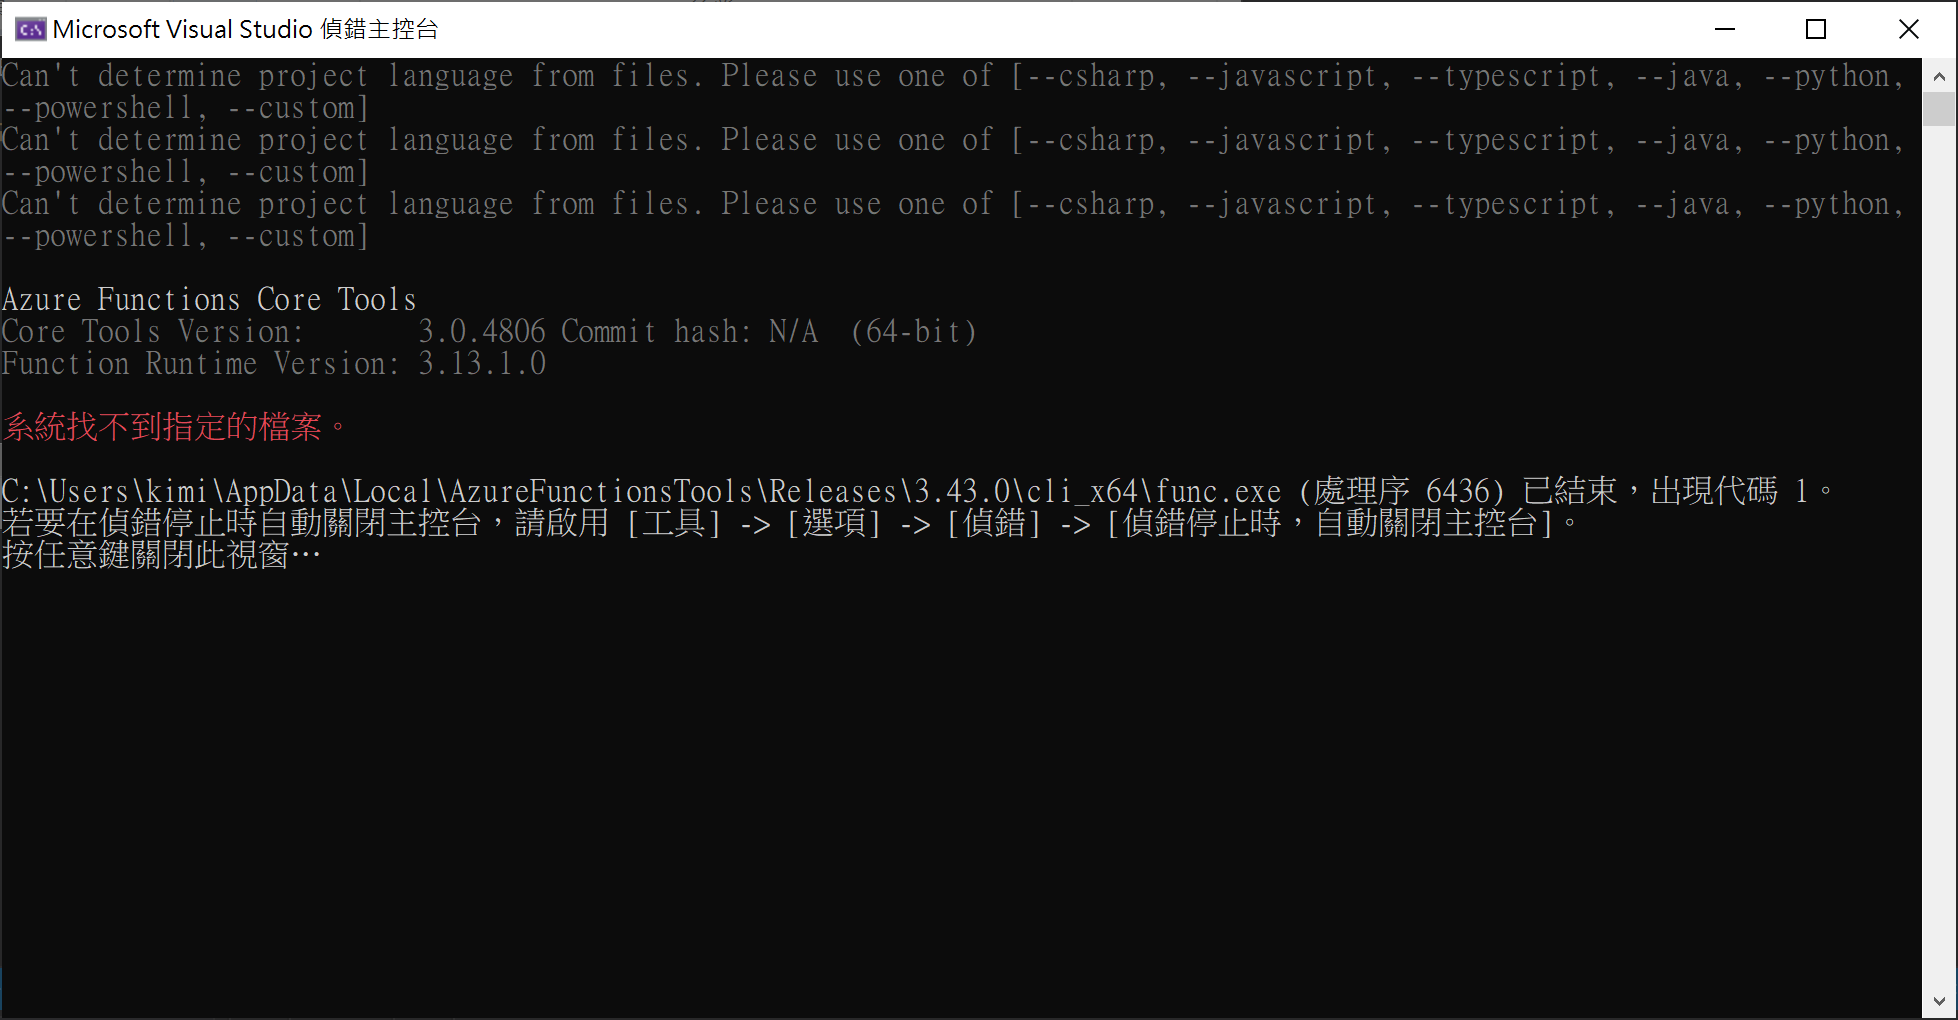
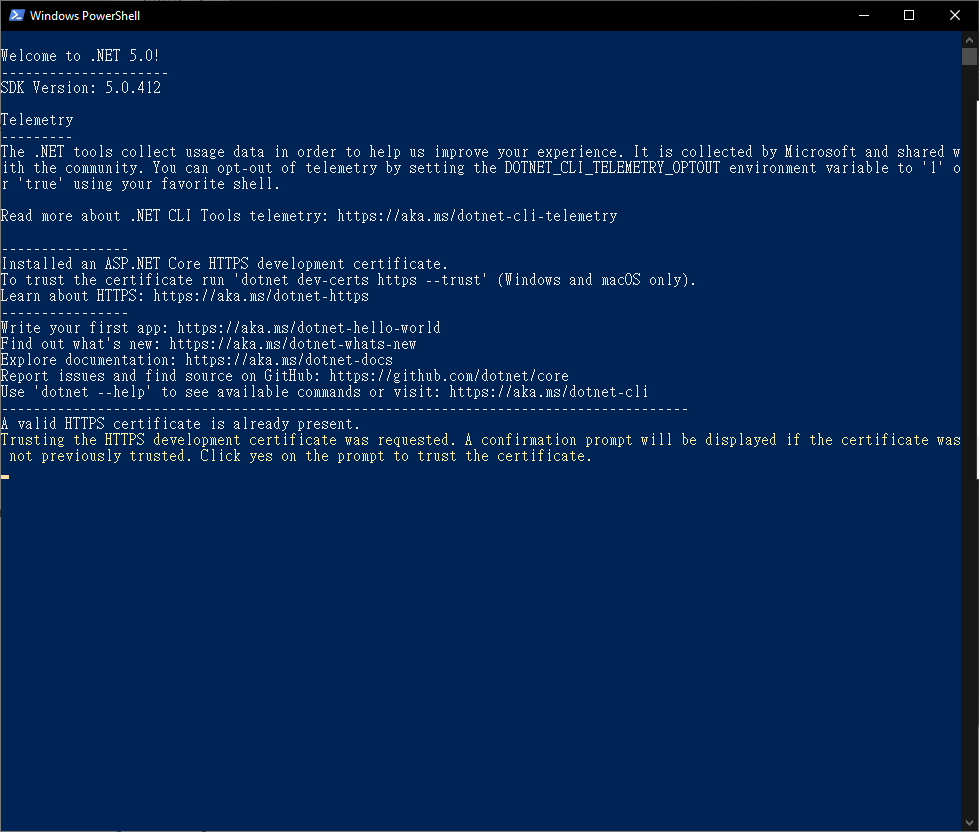
4. Run the WinGet.RestSource.Functions project locally in Visual Studio using F5.
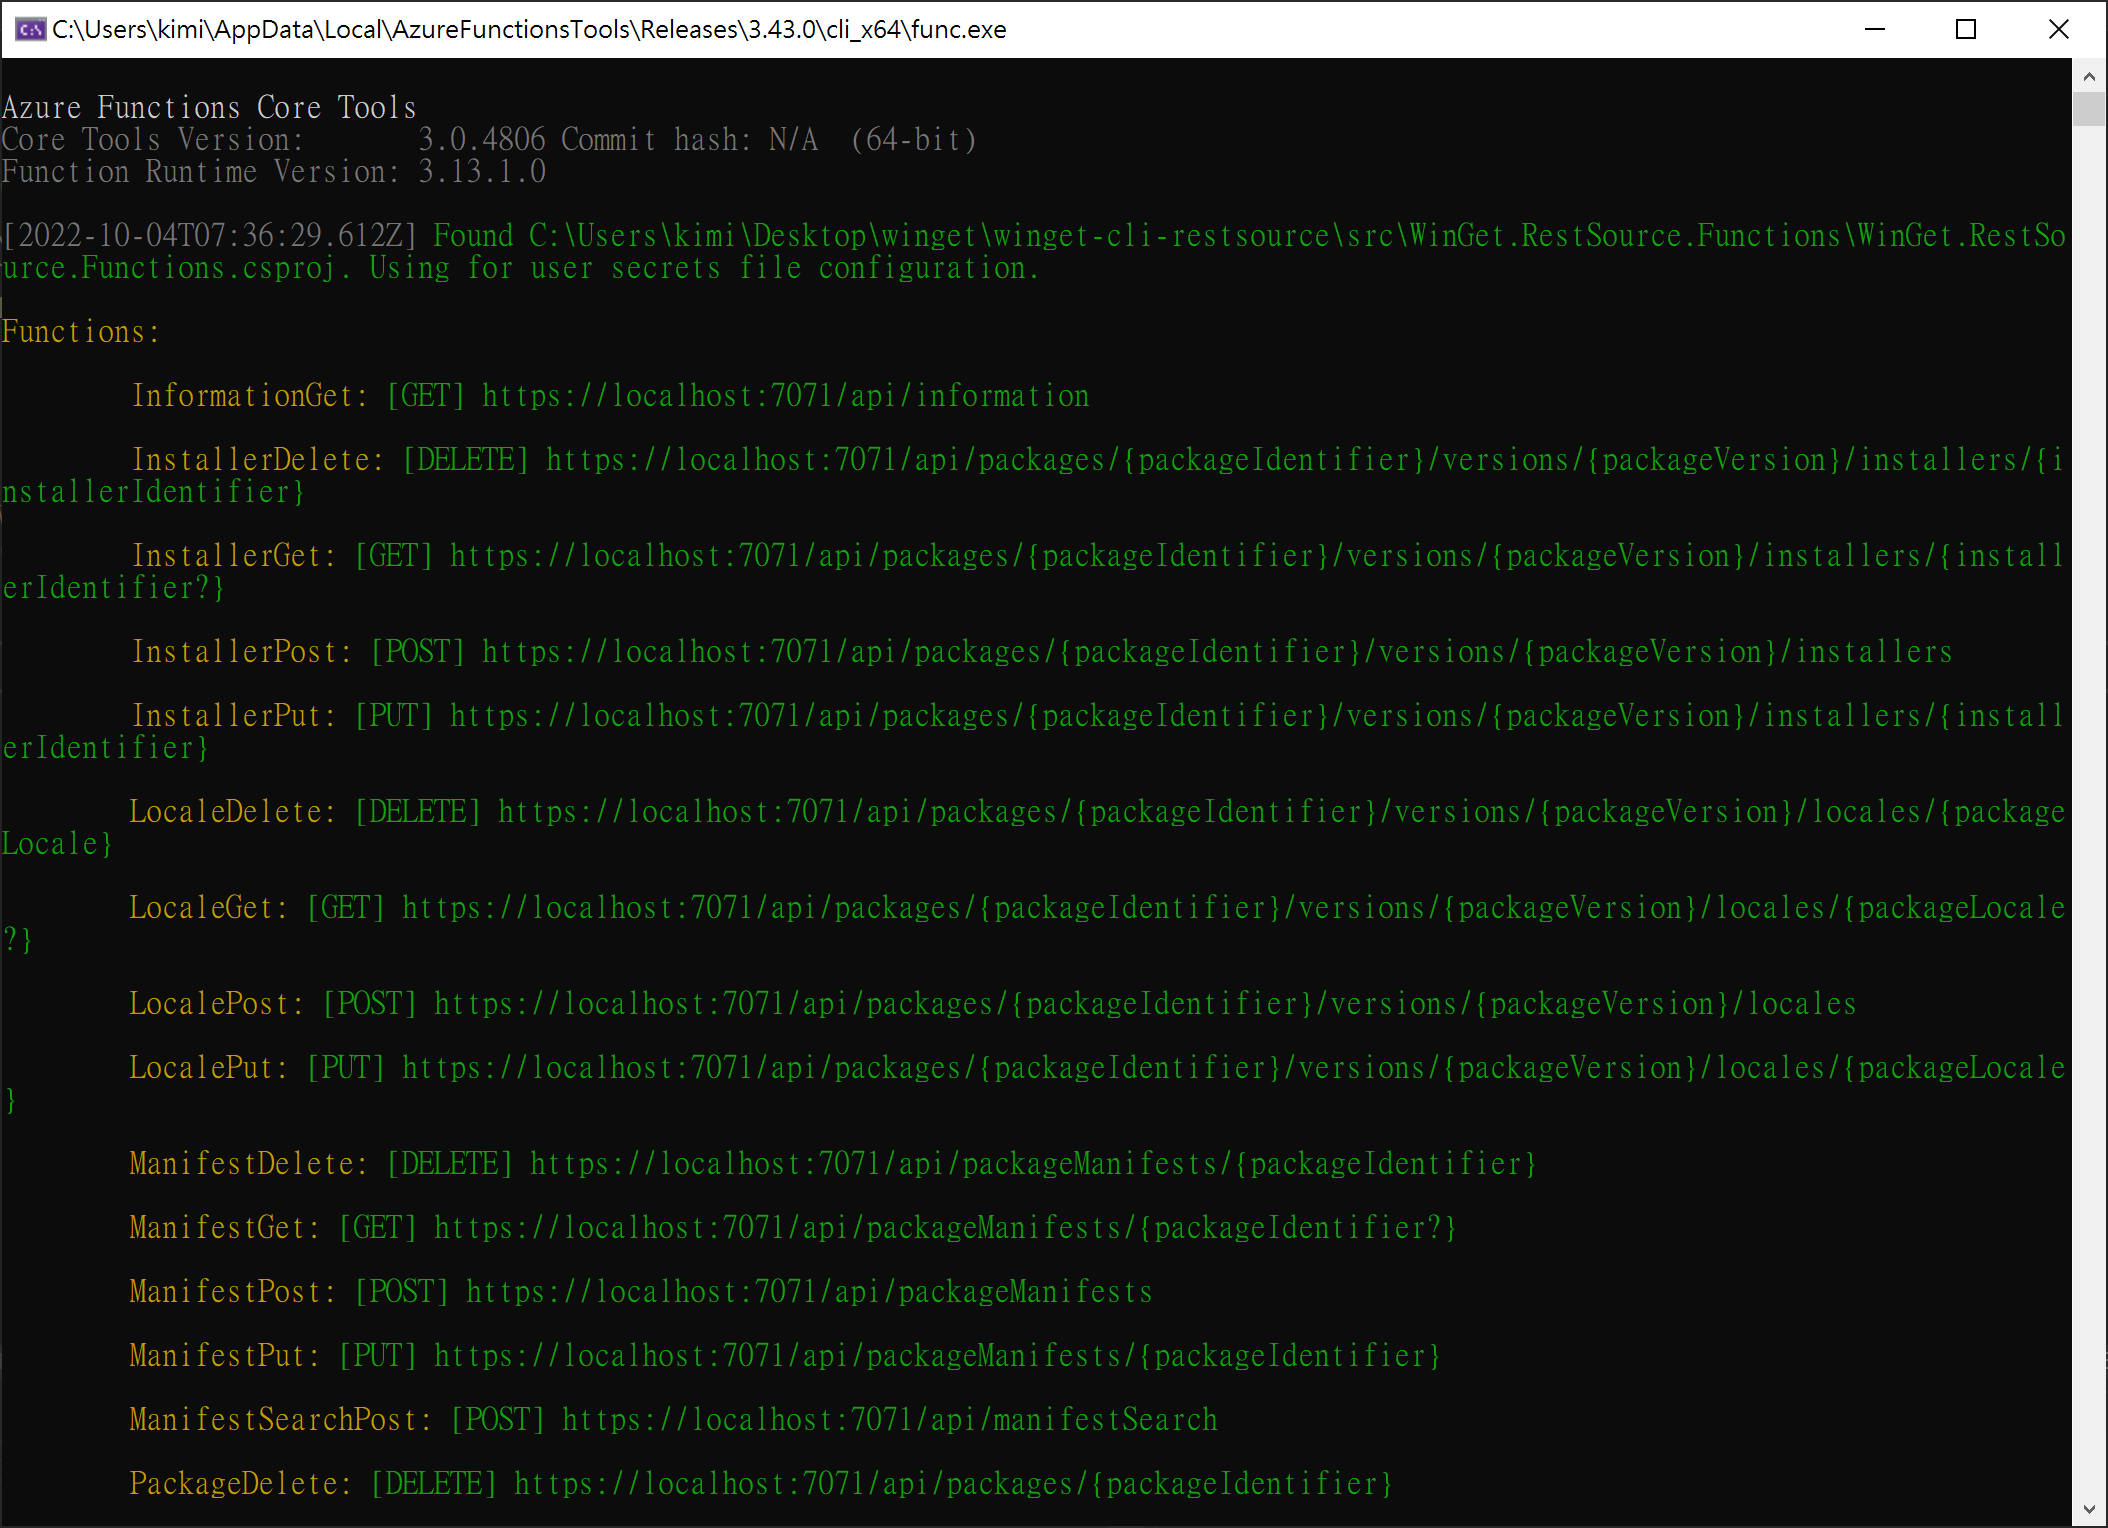
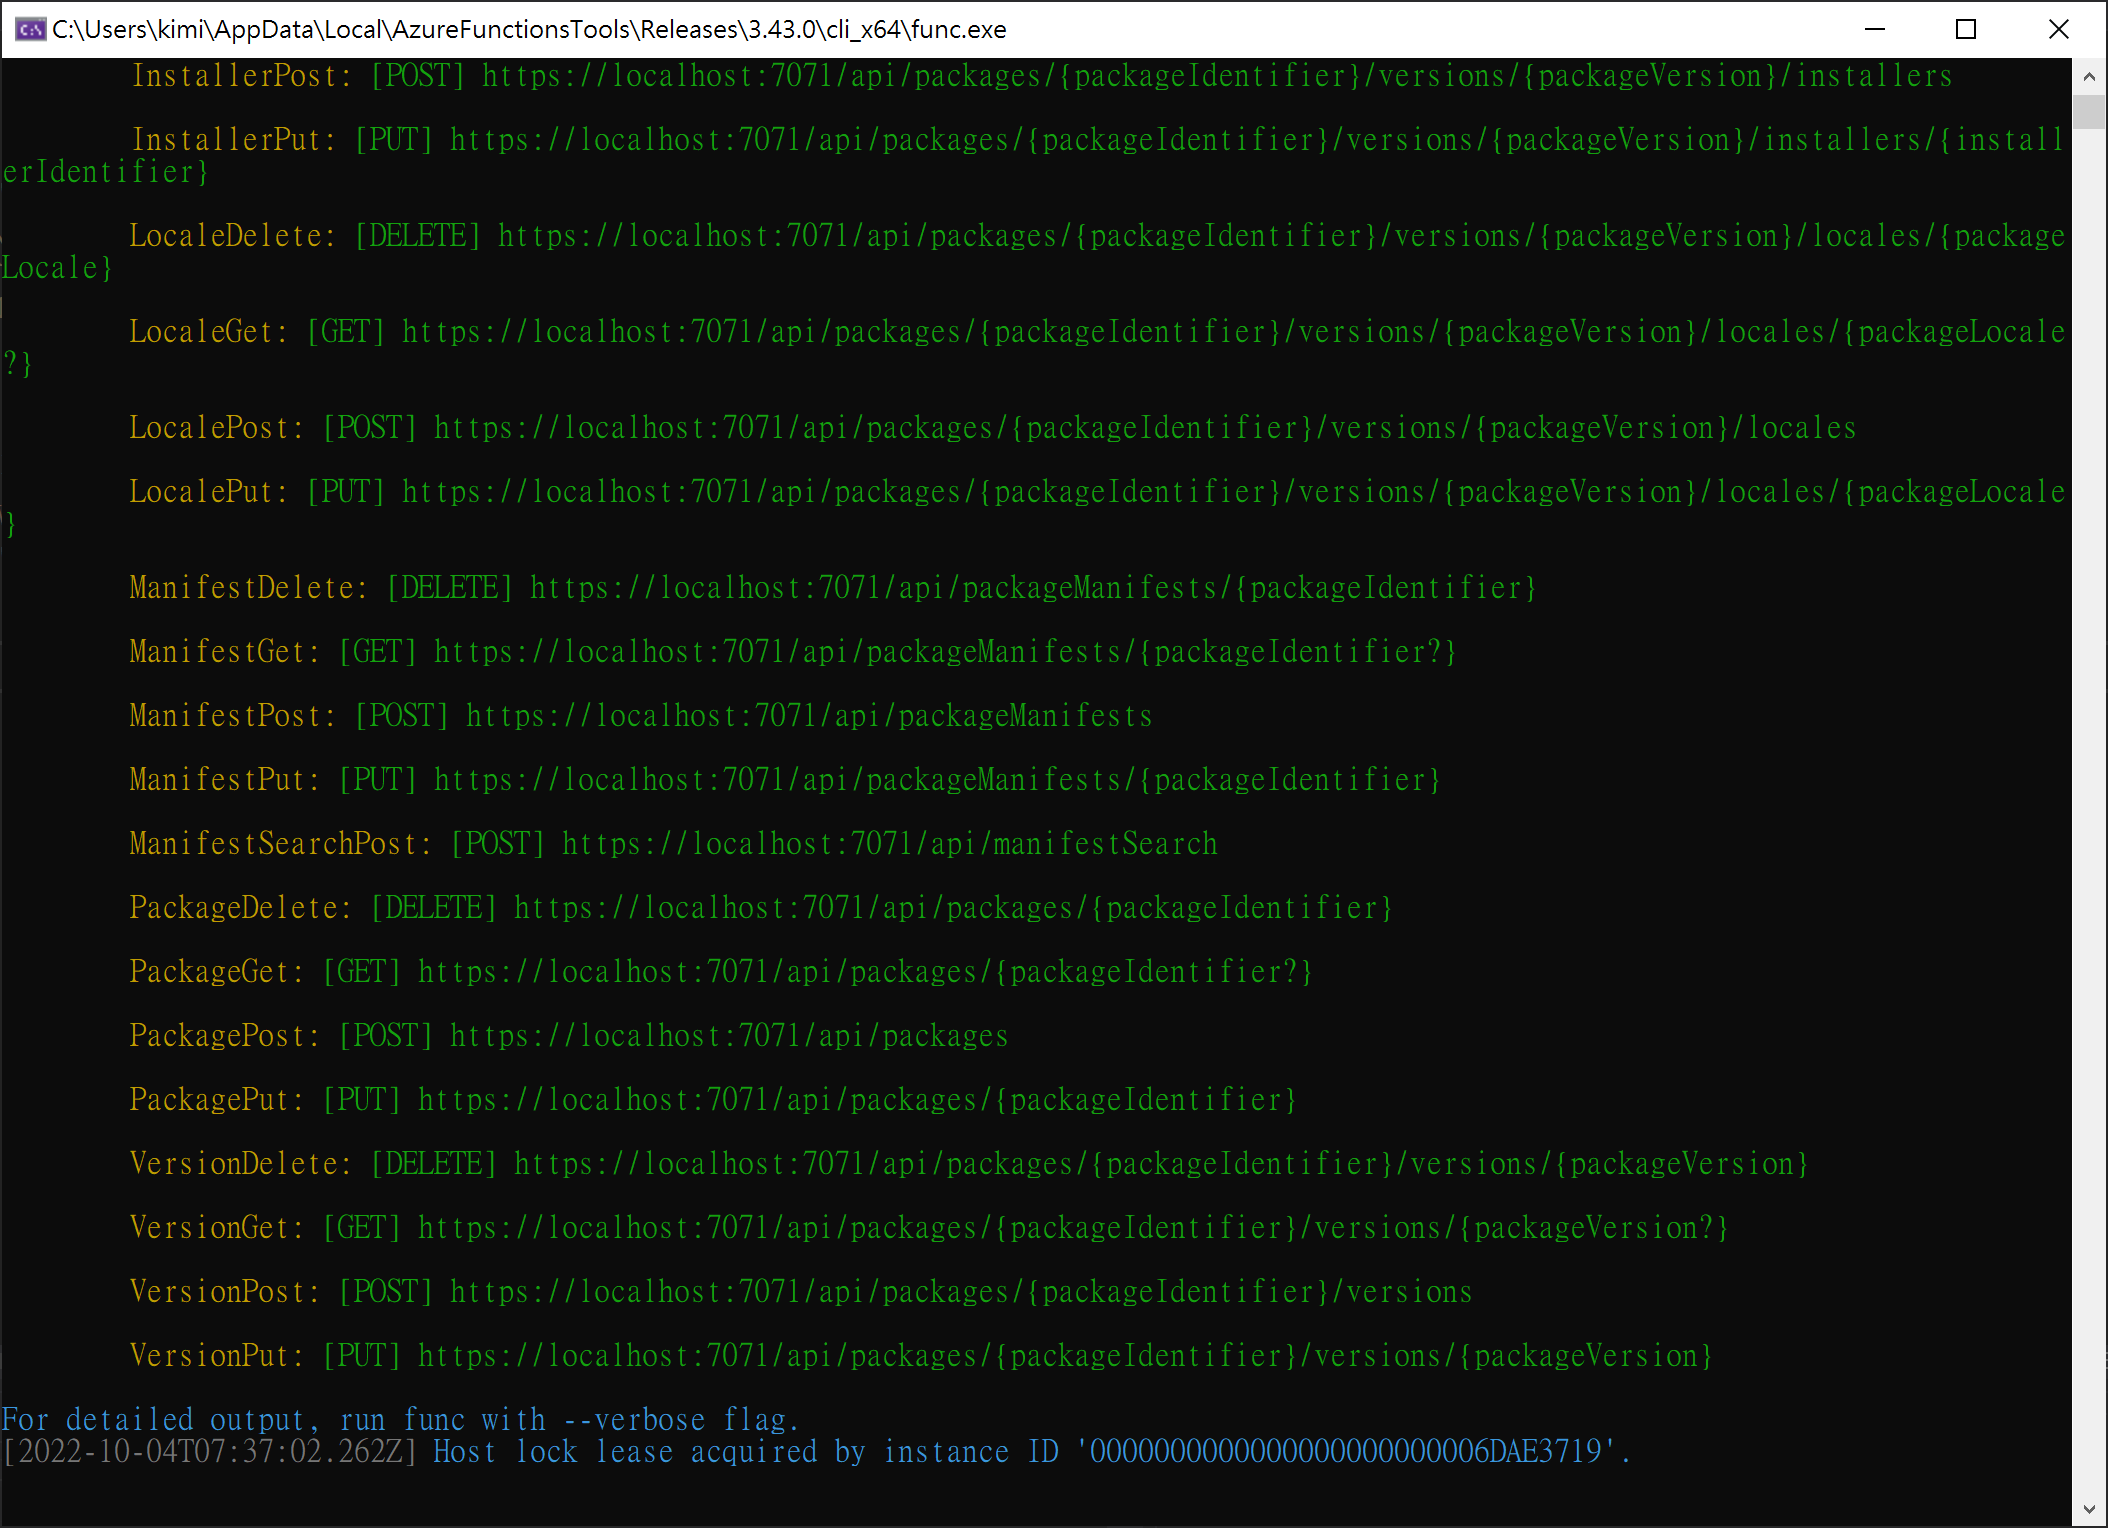
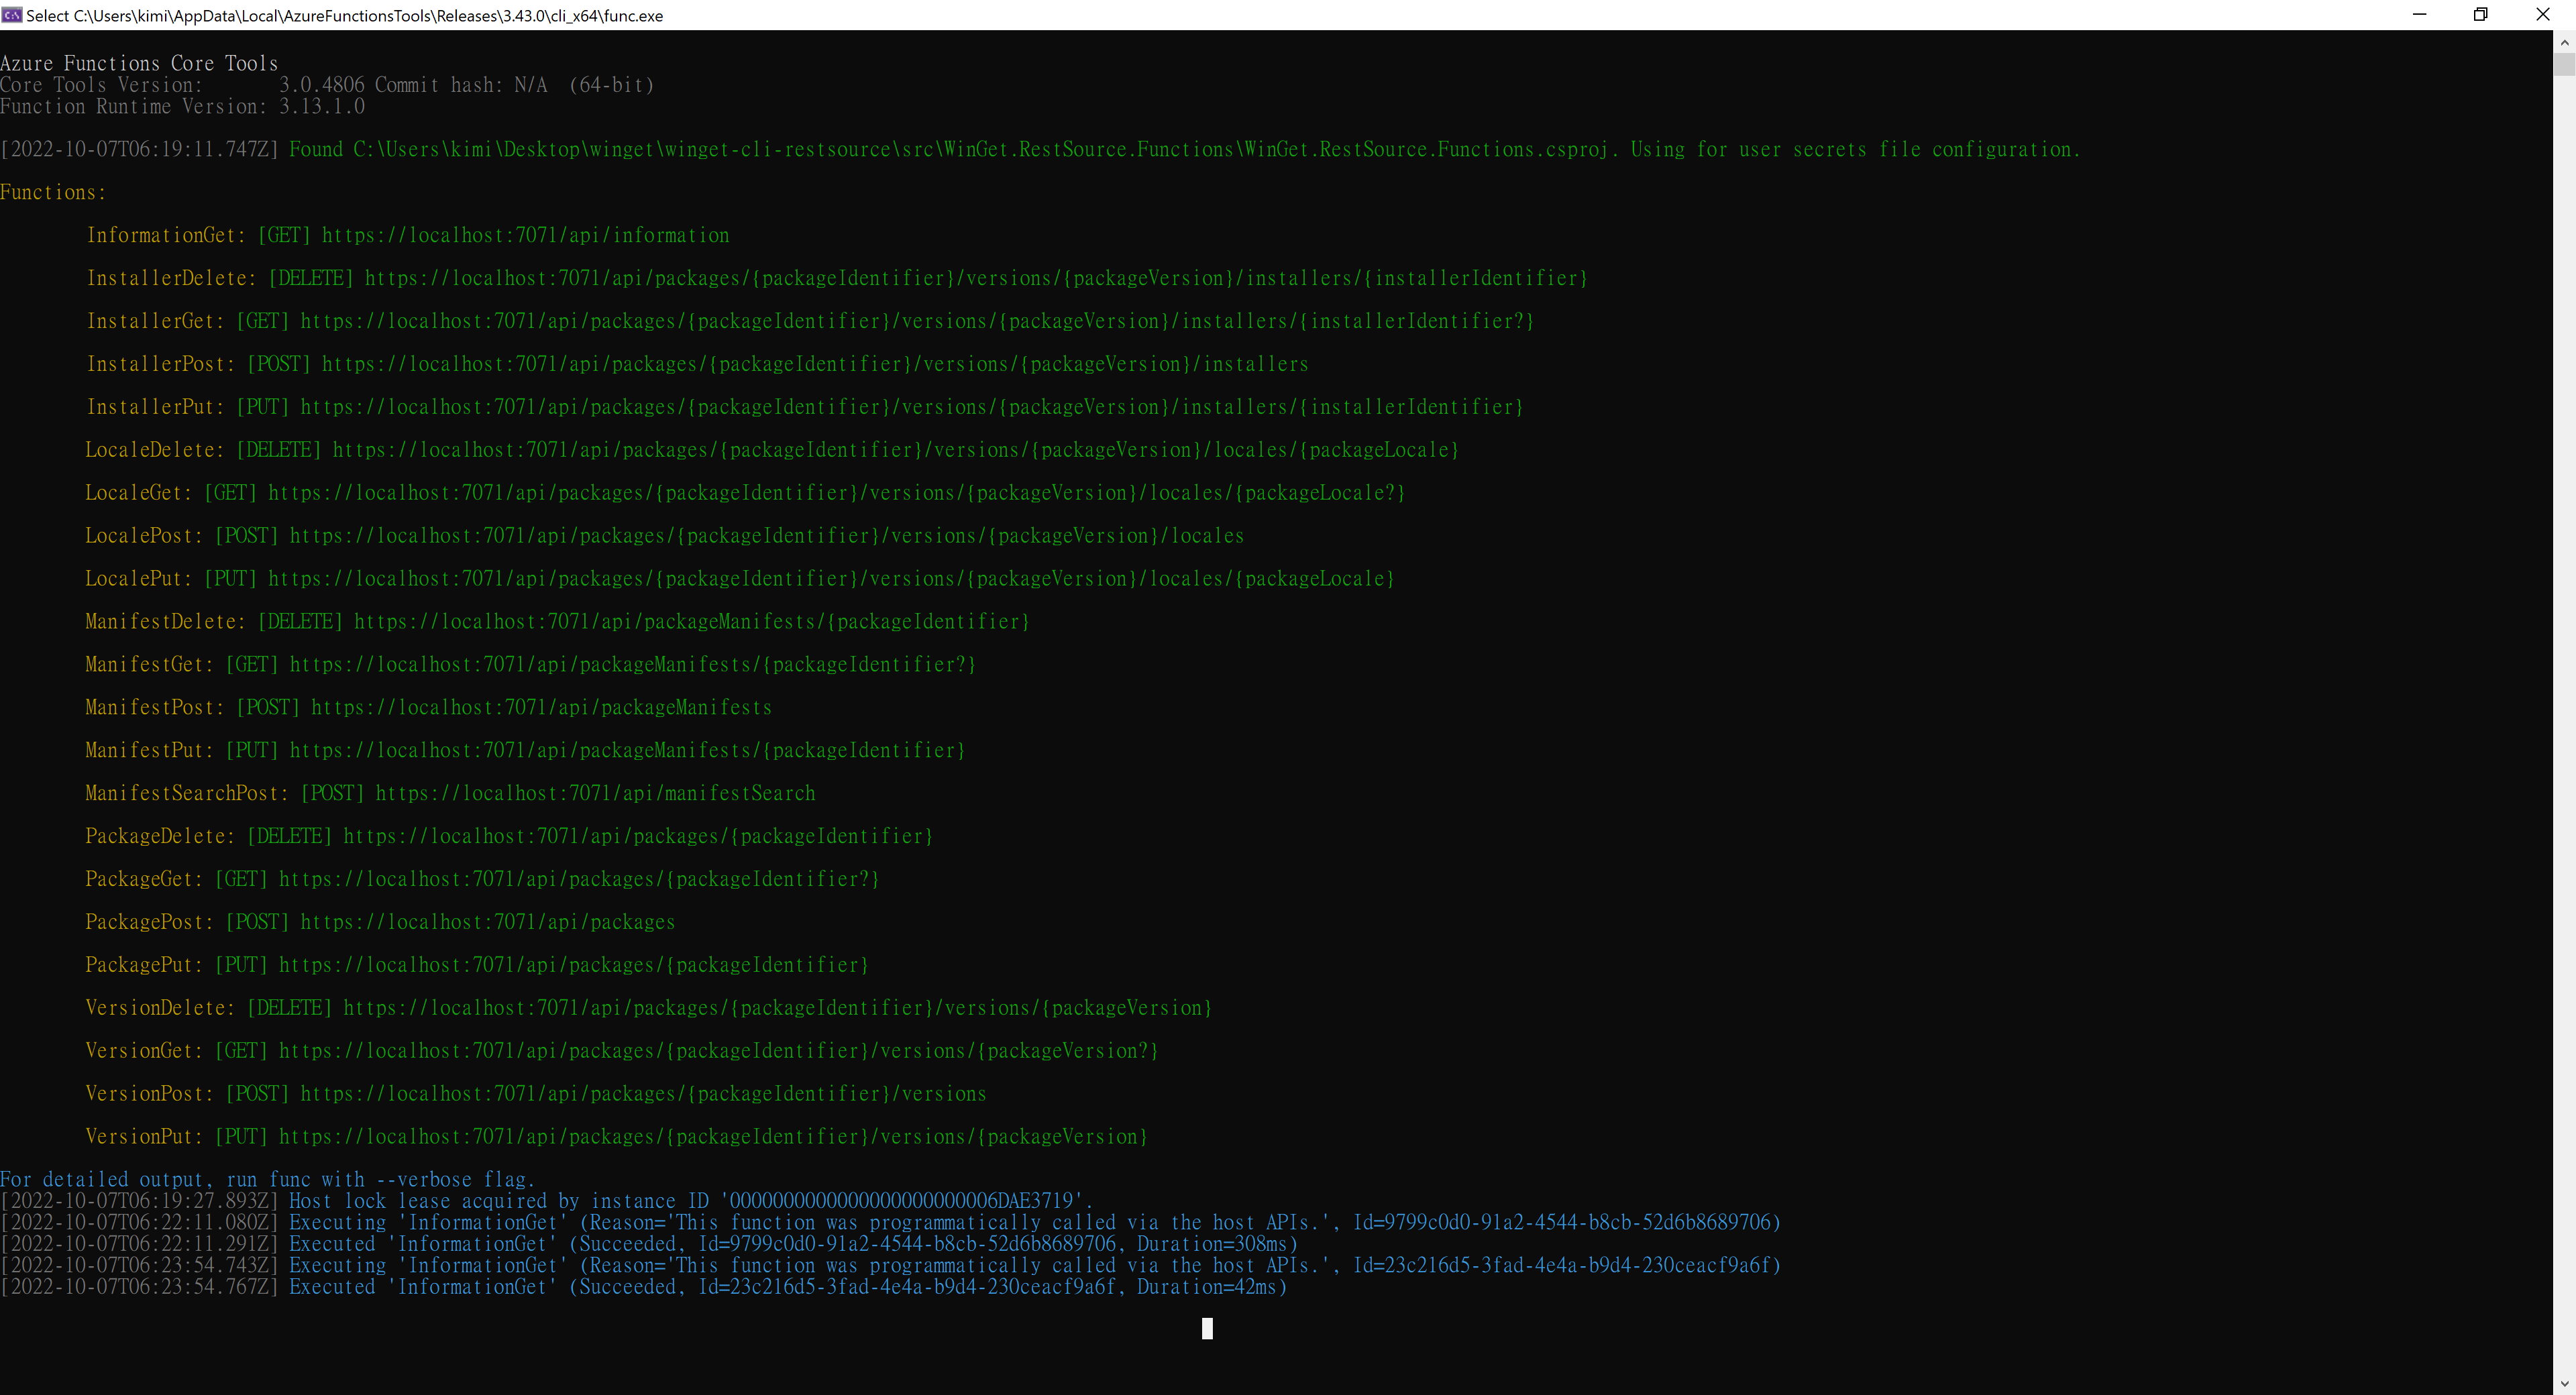
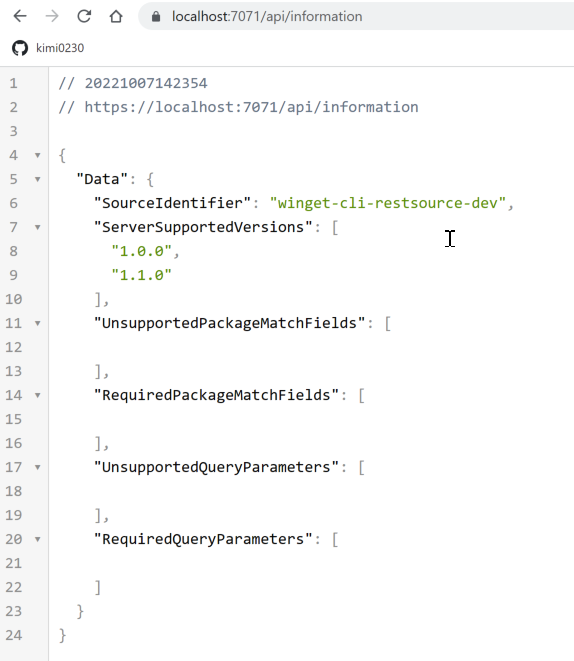
InformationGet: [GET] https://localhost:7071/api/information

InstallerDelete: [DELETE] https://localhost:7071/api/packages/{packageIdentifier}/versions/{packageVersion}/installers/{installerIdentifier}

InstallerGet: [GET] https://localhost:7071/api/packages/{packageIdentifier}/versions/{packageVersion}/installers/{installerIdentifier?}

InstallerPost: [POST] https://localhost:7071/api/packages/{packageIdentifier}/versions/{packageVersion}/installers

InstallerPut: [PUT] https://localhost:7071/api/packages/{packageIdentifier}/versions/{packageVersion}/installers/{installerIdentifier}

LocaleDelete: [DELETE] https://localhost:7071/api/packages/{packageIdentifier}/versions/{packageVersion}/locales/{packageLocale}

LocaleGet: [GET] https://localhost:7071/api/packages/{packageIdentifier}/versions/{packageVersion}/locales/{packageLocale?}

LocalePost: [POST] https://localhost:7071/api/packages/{packageIdentifier}/versions/{packageVersion}/locales

LocalePut: [PUT] https://localhost:7071/api/packages/{packageIdentifier}/versions/{packageVersion}/locales/{packageLocale}

ManifestDelete: [DELETE] https://localhost:7071/api/packageManifests/{packageIdentifier}

ManifestGet: [GET] https://localhost:7071/api/packageManifests/{packageIdentifier?}

ManifestPost: [POST] https://localhost:7071/api/packageManifests

ManifestPut: [PUT] https://localhost:7071/api/packageManifests/{packageIdentifier}

ManifestSearchPost: [POST] https://localhost:7071/api/manifestSearch

PackageDelete: [DELETE] https://localhost:7071/api/packages/{packageIdentifier}

PackageGet: [GET] https://localhost:7071/api/packages/{packageIdentifier?}

PackagePost: [POST] https://localhost:7071/api/packages

PackagePut: [PUT] https://localhost:7071/api/packages/{packageIdentifier}

VersionDelete: [DELETE] https://localhost:7071/api/packages/{packageIdentifier}/versions/{packageVersion}

VersionGet: [GET] https://localhost:7071/api/packages/{packageIdentifier}/versions/{packageVersion?}

VersionPost: [POST] https://localhost:7071/api/packages/{packageIdentifier}/versions

VersionPut: [PUT] https://localhost:7071/api/packages/{packageIdentifier}/versions/{packageVersion}
5. Add it as a source in winget with:
Run as Administrator
winget source add -n "winget-pkgs-restsource" -a https://localhost:7071/api/ -t "Microsoft.Rest"
winget source add
winget source add [-n, --name] <name> [-a, --arg] <url> [[-t, --type] <type>]
 Your commands to winget will now use your locally running REST instance as the primary source.
Azure Cosmos DB
Azure Cosmos DB 模擬器提供一個模擬 Azure Cosmos DB 服務的本機環境做為開發之用。 您可以使用 Azure Cosmos DB 模擬器在本機開發及測試應用程式,不需建立 Azure 訂用帳戶,也不會產生任何費用。 如果您滿意應用程式在 Azure Cosmos DB 模擬器中的運作方式,就可以切換成使用雲端的 Azure Cosmos 帳戶。 Download the emulator
Azure Cosmos DB Emulator
Azure Cosmos DB 模擬器提供 Azure Cosmos DB 服務的高逼真度模擬。 它支援與 Azure Cosmos DB 對等的功能,包括建立資料、查詢資料、佈建和縮放容器,以及執行預存程序和觸發程序。 您可以使用 Azure Cosmos DB 模擬器來開發和測試應用程式,並藉由更新 Azure Cosmos DB 連線端點,以全球規模將它們部署至 Azure。
雖然 Azure Cosmos DB 服務的模擬很可靠,但模擬器的實作會與服務有所不同。 例如,模擬器會使用標準的作業系統元件,比如使用本機檔案系統以獲得持續性,以及使用 HTTPS 通訊協定堆疊進行連線。 當您使用模擬器時,依賴 Azure 基礎結構的功能 (例如全域複寫、讀取/寫入的個位數毫秒延遲,以及可調整的一致性層級) 均不適用。
您可以使用Azure Cosmos DB 資料移轉工具,在 Azure Cosmos DB 模擬器與 Azure Cosmos DB 服務之間移轉資料。
Azure Cosmos DB Emulator provides a high-fidelity emulation of the Azure Cosmos DB service. It supports equivalent functionality as the Azure Cosmos DB, which includes creating data, querying data, provisioning and scaling containers, and executing stored procedures and triggers. You can develop and test applications using the Azure Cosmos DB Emulator, and deploy them to Azure at global scale by updating the Azure Cosmos DB connection endpoint.
While emulation of the Azure Cosmos DB service is faithful, the emulator's implementation is different than the service. For example, the emulator uses standard OS components such as the local file system for persistence, and the HTTPS protocol stack for connectivity. Functionality that relies on the Azure infrastructure like global replication, single-digit millisecond latency for reads/writes, and tunable consistency levels are not applicable when you use the emulator.
You can migrate data between the Azure Cosmos DB Emulator and the Azure Cosmos DB service by using the Azure Cosmos DB Data Migration Tool.
Software requirements:
- Currently Windows Server 2016, 2019 or Windows 10 host OS are supported. The host OS with Active Directory enabled is currently not supported.
- 64-bit operating system
Minimum hardware requirements:
- 2-GB RAM
- 10-GB available hard disk space
Change the number of default containers
By default, you can create up to 25 fixed size containers (only supported using Azure Cosmos DB SDKs), or 5 unlimited containers using the Azure Cosmos DB Emulator. By modifying the PartitionCount value, you can create up to 250 fixed size containers or 50 unlimited containers, or any combination of the two that does not exceed 250 fixed size containers (where one unlimited container = 5 fixed size containers). However it's not recommended to set up the emulator to run with more than 200 fixed size containers. Because of the overhead that it adds to the disk IO operations, which result in unpredictable timeouts when using the endpoint APIs.
[下載 Cosmos DB 模擬器])(https://aka.ms/cosmosdb-emulator)
啟動後輸入網址 https://localhost:8081/_explorer/index.html
可以看到 Cosmos 連線資訊
Differences between the emulator and the cloud service
因為 Azure Cosmos DB 模擬器提供一個在本機開發人員工作站上執行的模擬環境,所以在模擬器和雲端 Azure Cosmos 帳戶之間有一些功能上的差異:
- 目前模擬器中的 [資料總管] 窗格完全支援僅限 SQL API 用戶端。 [資料總管] 檢視和適用於 Azure Cosmos DB API (例如 MongoDB、資料表、圖表及 Cassandra API) 的作業並未受到完全支援。
- 模擬器僅支援單一固定帳戶及已知的主要金鑰。 使用 Azure Cosmos DB 模擬器時,您無法重新產生金鑰,不過,您可以使用 command-line 選項來變更預設金鑰。
- 使用模擬器時,您僅能在provisioned throughput mode中建立 Azure Cosmos 帳戶,目前不支援無伺服器模式。
- 模擬器是一項無法擴充的服務,也不支援大量容器。 依預設,使用 Azure Cosmos DB 模擬器時,您最多可以建立 25 個 400 RU/秒的固定大小容器 (僅支援使用 Azure Cosmos DB SDK),或者,建立 5 個無限制的容器。 如需如何變更此值的詳細資訊,請參閱設定 PartitionCount value 文章。
- 模擬器不提供不同 Azure Cosmos DB 的一致性層級。
- 模擬器不提供multi-region replication。
- 因為 Azure Cosmos DB 服務最新的變更,您的 Azure Cosmos DB 模擬器複本可能不會一直是最新狀態,您應該一律參閱 Azure Cosmos DB capacity planner ,準確地評估應用程式的輸送量 (RUs) 需求。
- 模擬器支援的識別碼屬性大小上限為 254 個字元。
Running Tests
Running tests are a great way to ensure that functionality is preserved across major changes. You can run these tests in Visual Studio Test Explorer. In Visual Studio, run the tests from the menu with Test > Run All Tests
Unit Testing Prerequisites
- Install the Azure Cosmos DB 模擬器 : 安裝並使用 Azure Cosmos DB 模擬器進行本機開發和測試`
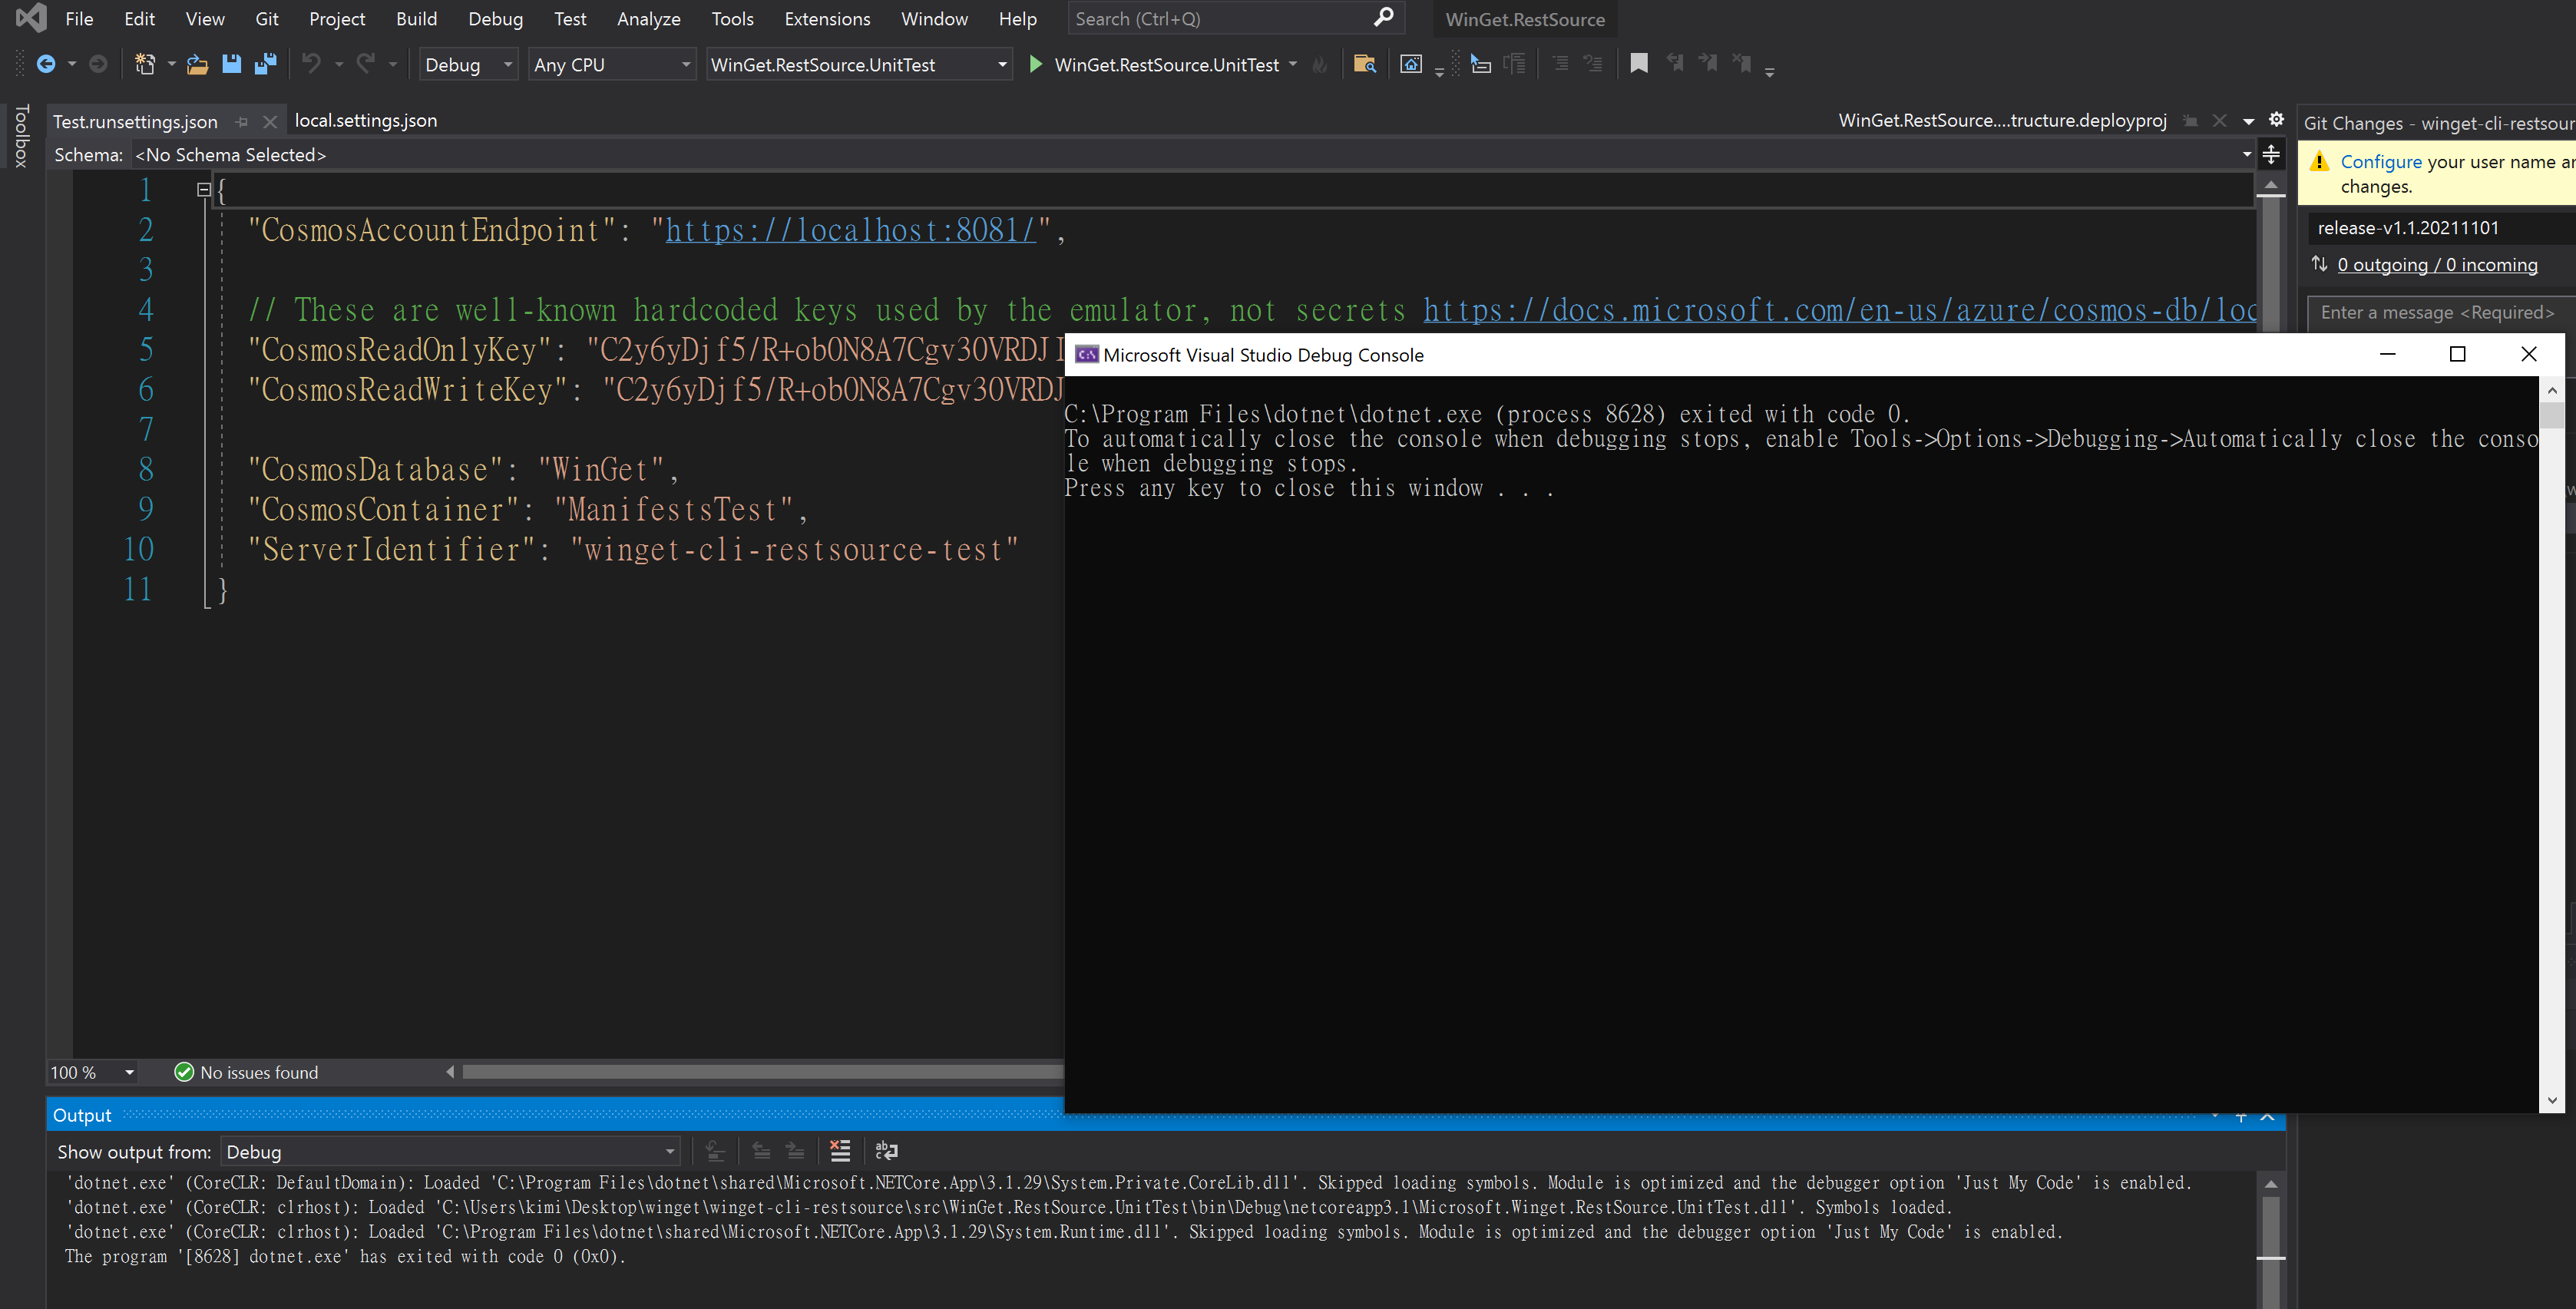
- Copy the
WinGet.RestSource.UnitTest\Test.runsettings.template.jsontemplate configuration toTest.runsettings.json- The defaults should work for your local Cosmos DB emulator instance. You can change the configuration to point to a Cosmos DB instance in Azure instead.
- Alternatively, all of the test configuration properties can be set as environment variables. This is useful for overriding properties in an ADO build.
- 將所有測試配置屬性設置為環境變量。這對於在 Azure DevOps Test Build中, 覆蓋 properties 很有效
Integration Testing Prerequisites
- Install the winget client locally.
- Copy the
WinGet.RestSource.IntegrationTest\Test.runsettings.template.jsontemplate configuration toTest.runsettings.json- Modify the
RestSourceUrlproperty to point to a deployed rest source endpoint. You can use the below instructions to deploy a rest instance. - If the local winget client doesn't already have the source added, the integration tests can add it. To do so, change the
AddRestSourceproperty to true. Visual Studio must be running as admin in this case.- 如果你的 winget 沒有將此 source add 進去的話, 可藉由
integration tests加進去, 將AddRestSource設成true
- 如果你的 winget 沒有將此 source add 進去的話, 可藉由
- There is a test case that modifies the rest source. By default it's disabled, to run it the
RunWriteTestssetting must be set to true. TheFunctionsHostKeysetting must also be set since the add/update/delete endpoints all require function authorization. We recommend creating a new pipeline-specific host key for this purpose.
- Modify the
Automatically create a rest source
The Microsoft.WinGet.Source PowerShell module provides the New-WinGetSource cmdlet to simplify the creation of a Windows Package Manager rest source. This PowerShell cmdlet will initiate a connection to Azure if not currently connected. Validating that the connection is established with a specific Subscription (if specified). Generate the ARM Parameter files with specified values, then create Azure resources with the generated ARM Parameter files and the provided ARM Template files.
The New-WinGetSource PowerShell cmdlet makes use of the following input parameters. For more information on how to use this cmdlet, use the Get-Help New-WinGetSource -Full or visit the New-WinGetSource PowerShell Article in Docs.
| Required | Parameter | Description |
|---|---|---|
| Yes | Name | A string of letters which will be prefixed to your newly created Azure resources. |
| Yes | Index | A string of letters or numbers which will be suffix to your newly created Azure resources. |
| Yes | ResourceGroup | The Resource Group that will be used to contain the Azure resources. |
| No | SubscriptionName | The name of the Azure Subscription that will be used to pay for the Azure resources. |
| No | Region | The Azure location where the Azure resources will be created. (Default: westus) |
| No | ParameterOutput | The folder location that contains new items will be created in. |
| No | RestSourcePath | Path to the compiled Rest API Zip file. (Default: .\RestAPI\CompiledFunctions.ps1) |
| No | ImplementationPerformance | specifies the performance of the resources to be created for the Windows Package Manager rest source. ["Demo", "Basic", "Enhanced"] |
| No | ShowConnectionInstructions | If specified, the instructions for connecting to the Windows Package Manager rest source. (Default: False) |
[!Note] The PowerShell Module must be re-imported each time the PowerShell window is closed.
How to:
- From the Administrative PowerShell window run the following:
PS C:\> New-WinGetSource -Name "contoso" -ResourceGroup "WinGetPrivateSource" -Region "westus" -ImplementationPerformance "Demo" -ShowConnectionInstructions - After the above has completed, copy and run the connection information provided for your newly created Windows Package Manager rest source to add it to your WinGet client.
Welcome to the Windows Package Manager Manifest Creator repository
https://github.com/microsoft/winget-create This repository contains the source code for the Windows Package Manager Manifest Creator. The Windows Package Manager Manifest Creator is designed to help generate or update manifest files for the Community repo.
Getting Started
For your convenience, WingetCreate can be acquired a number of ways.
Install from the github repo
The Windows Package Manager Manifest Creator is available for download from the winget-create repository. To install the package, simply click the the MSIX file in your browser. Once it has downloaded, click open.
Install with Windows Package Manager
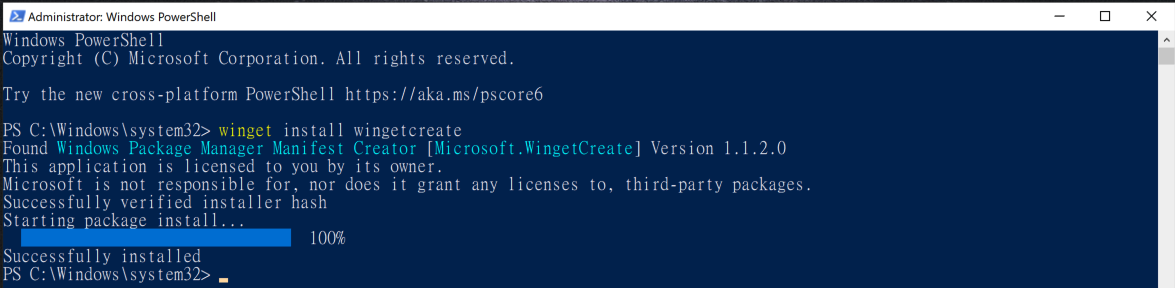
winget install wingetcreate
Using Windows Package Manager Manifest Creator
WingetCreate has the following commands:
| Command | Description |
|---|---|
| New | Command for creating a new manifest from scratch |
| Update | Command for updating an existing manifest |
| Submit | Command for submitting an existing PR |
| Token | Command for managing cached GitHub personal access tokens |
| Settings | Command for editing the settings file configurations |
| Cache | Command for managing downloaded installers stored in cache |
| -? | Displays command line help |
Click on the individual commands to learn more.
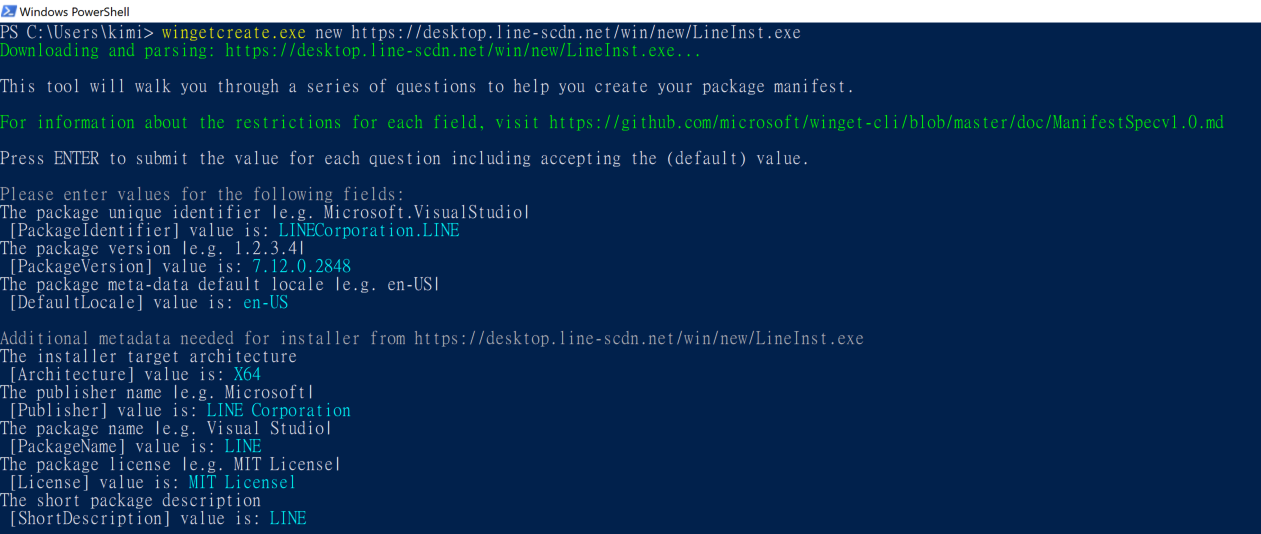
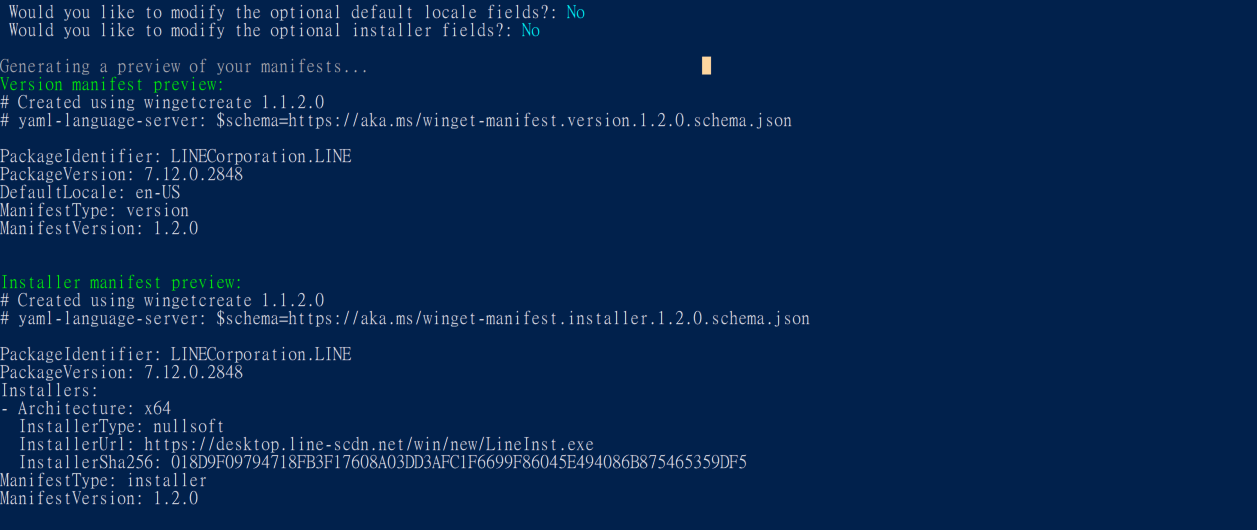
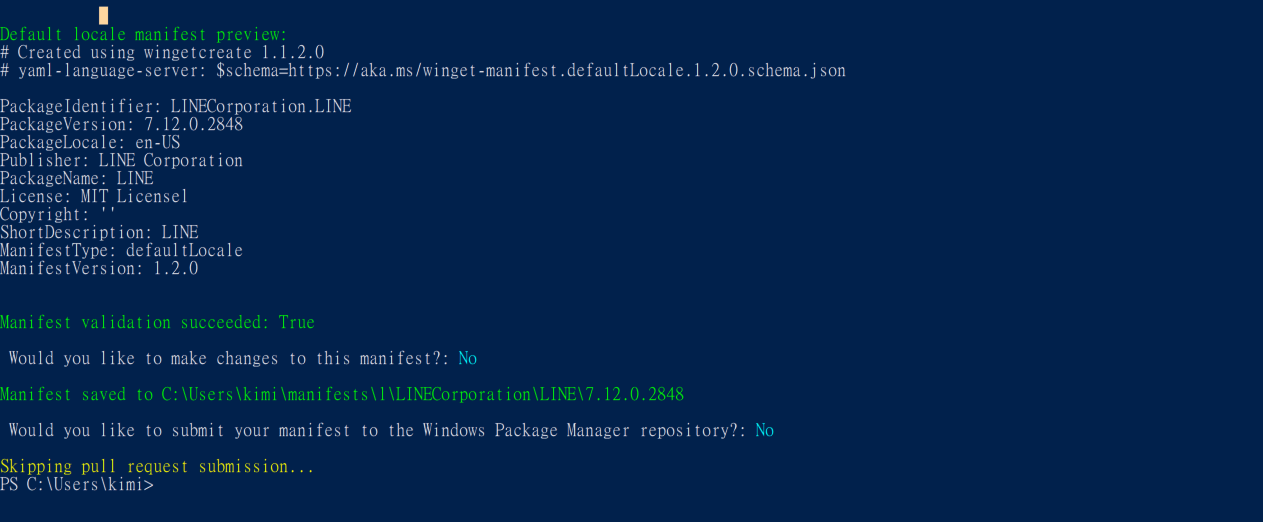
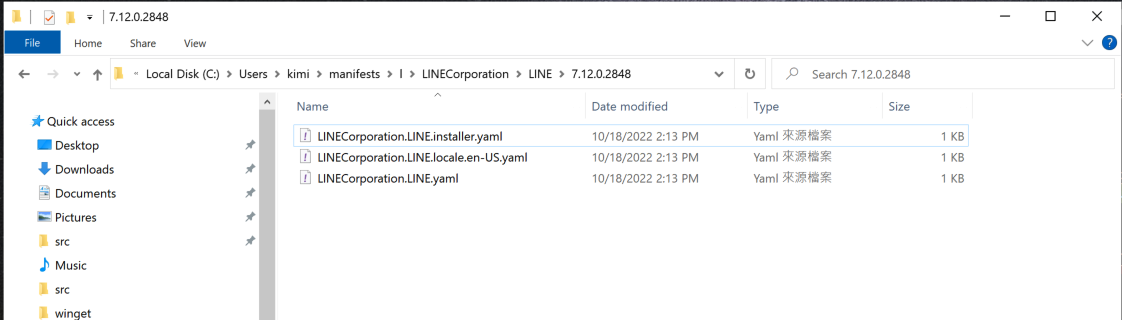
Command : New
wingetcreate.exe new https://desktop.line-scdn.net/win/new/LineInst.exe
Demo 上傳下載
TODO:...
上下架流程
TODO:...
2266
https://serverfault.com/questions/1098513/how-do-i-host-a-private-winget-repository-on-an-on-premise-server You add a source, it can be any http/https address (but not currently unc path to a \server\share). The structure needs to follow the same manifest folder structure as Microsoft's github: https://github.com/microsoft/winget-pkgs/tree/master/manifests
[edit] Been trying this myself the past few days. SSL cert is actually required (other articles I read saying http proved to be incorrect). The reference implementation specifies CosmoDB but there is an emulator which can run locally instead of Azure. In fact any NoSQL implementation would probably work such as mongodb/Apache CouchDB. Much of the rest of it requires an Azure tenancy & subscription. It may be possible to self host and manually re-write the VS code provided, but as it currently stands there's no documentation or reference implementation for this, so I don't think it's a practical solution for production use yet sadly. We're holding off and sticking with chocolatey (which supports http(s) and UNC fileshare paths etc) until this situation improves.
Create a Windows Package Manager REST source
PowerShell pre-Requisites
Before getting started with the Windows Package Manager REST source with PowerShell, here are a few recommended steps you should complete before using the PowerShell module to ensure you can successfully stand up a new Windows Package Manager REST source in Azure.
- Open PowerShell as an Administrator
- Set the PowerShell execution policies
PS C:\> Set-ExecutionPolicy -ExecutionPolicy RemoteSigned -Scope CurrentUser - Install the Azure Az module
PS C:\> install-module az -AllowClobber - Connect to Azure with an authenticated account
PS C:\> Connect-AzAccount - Select the required subscription using Set-AzContext
PS C:\> Set-AzContext -Subscription [Paste the Azure Subscription here]
Download and install the PowerShell module
The following steps must be performed before the PowerShell cmdlets are available for use with the Windows Package Manager REST source.
- Open an Edge Browser.
- Navigate to https://github.com/microsoft/winget-cli-restsource/releases.
- Download the latest release of the Microsoft.WinGet.Source PowerShell module. (
WinGet.RestSource-Winget.PowerShell.Source.zip) - Open a File Explorer window, and navigate to where you downloaded the Microsoft.WinGet.Source PowerShell module.
- Right-click on WinGet.RestSource-Winget.PowerShell.Source.zip, and select Extract all from the drop-down menu.
- In the new window, select the Extract button.
- After the extraction has completed, navigate to '\WinGet.RestSource-Winget.Powershell.Source'.
- Open an Administrative PowerShell window.
- Ensure the downloaded Microsoft.WinGet.Source files are not blocked
PS C:\> Get-ChildItem -Path [Paste the path to the root folder of Microsoft.WinGet.Source] -Recurse | Unblock-File
PS C:\> Get-ChildItem -Path C:\Users\kimi\Desktop\winget\WinGet.RestSource-Winget.PowerShell.Source -Recurse | Unblock-File
- In combination, press
[Ctrl]+[Shift]+Right-clickon theMicrosoft.WinGet.Source.psd1file. Select Copy Path from the drop-down menu. - Run the following command from the Administrative PowerShell window:
PS C:\> Import-Module [Paste the path to the Microsoft.WinGet.Source.psd1 file]
PS C:\> Import-Module C:\Users\kimi\Desktop\winget\WinGet.RestSource-Winget.PowerShell.Source\Microsoft.WinGet.Source.psd1
Automatically create a rest source
The following steps are required for managing a Windows Package Manager REST source with PowerShell:
- Download and install the Microsoft.WinGet.Source PowerShell Module.
- Automate the creation of a Windows Package Manager REST source.
- Publishing Package Manifests to the Windows Package Manager REST source.
- Retrieve published Package Manifests from the Windows Package Manager REST source.
- Remove published Package Manifests from the Windows Package Manager REST source.
Automate the creation of a Windows Package Manager REST source
PS C:\> New-WinGetSource -Name "contosorestsource" -ResourceGroup "WinGet" -Region "westus" -ImplementationPerformance "Demo" -ShowConnectionInstructions

fix? : Run Install-Module Az
Add manifests to the REST source
PS C:\> Add-WinGetManifest -FunctionName "contoso" -Path "C:\Users\kimi\Desktop\winget\winget-pkgs\manifests\l\LINE\LINE\7.11.0.2821"
Get manifests from the REST source
PS C:\> Get-WinGetManifest -FunctionName "contoso" -PackageIdentifier "LINE"
Remove manifests from a REST source
PS C:\> Remove-WinGetManifest -FunctionName "contoso" -PackageIdentifier "LINE"
Manage Windows Package Manager REST source manually
Add manifests to the REST source
Issues
Errors
1. Build-Error : package not found

2. NU1101 找不到套件
NU1101 找不到套件 Microsoft.Cloud.InstrumentationFramework.NetStd。在來源中不存在此識別碼的套件: api.nuget.org WinGet.RestSource C:\Users\kimi\Desktop\winget\winget-cli-restsource\src\WinGet.RestSource\WinGet.RestSource.csproj 1
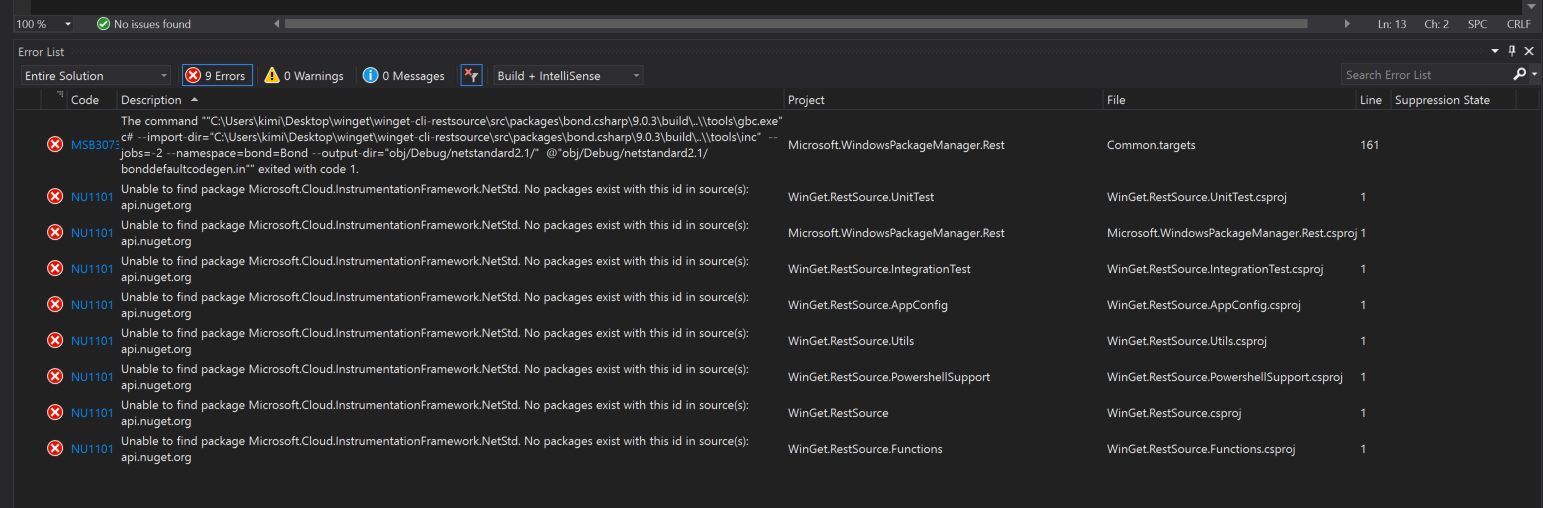
Solution:
Checkout branch to release-v1.1.2021110. 這包沒使用 Microsoft.Cloud.InstrumentationFramework.NetStd
3. 未經數位簽署。您無法在目前的系統上執行此指令碼
run winget-cli-restsource\src\WinGet.RestSource.Functions\generate_self_sign_cert.ps1
.\generate_self_sign_cert.ps1 : C:\Users\kimi\Desktop\winget\winget-cli-restsource\src\WinGet.RestSource.Functions\gene
rate_self_sign_cert.ps1 檔案無法載入。檔案 C:\Users\kimi\Desktop\winget\winget-cli-restsource\src\WinGet.RestSource.Fun
ctions\generate_self_sign_cert.ps1 未經數位簽署。您無法在目前的系統上執行此指令碼。如需關於執行指令碼及設定執行原則的詳
細資訊,請參閱 about_Execution_Policies (網址為 https:/go.microsoft.com/fwlink/?LinkID=135170)。
位於 線路:1 字元:1
+ .\generate_self_sign_cert.ps1
+ ~~~~~~~~~~~~~~~~~~~~~~~~~~~~~
    + CategoryInfo          : SecurityError: (:) [], PSSecurityException
    + FullyQualifiedErrorId : UnauthorizedAccess

Solution: https://learn.microsoft.com/zh-tw/powershell/module/microsoft.powershell.core/about/about_signing?view=powershell-7.2 若要在本機電腦上執行未簽署的腳本,並從其他使用者簽署腳本,請使用 [以系統管理員身分執行] 選項啟動 PowerShell,然後使用下列命令將電腦上的執行原則變更為 RemoteSigned:
Set-ExecutionPolicy RemoteSigned
4. This app can't run on your PC
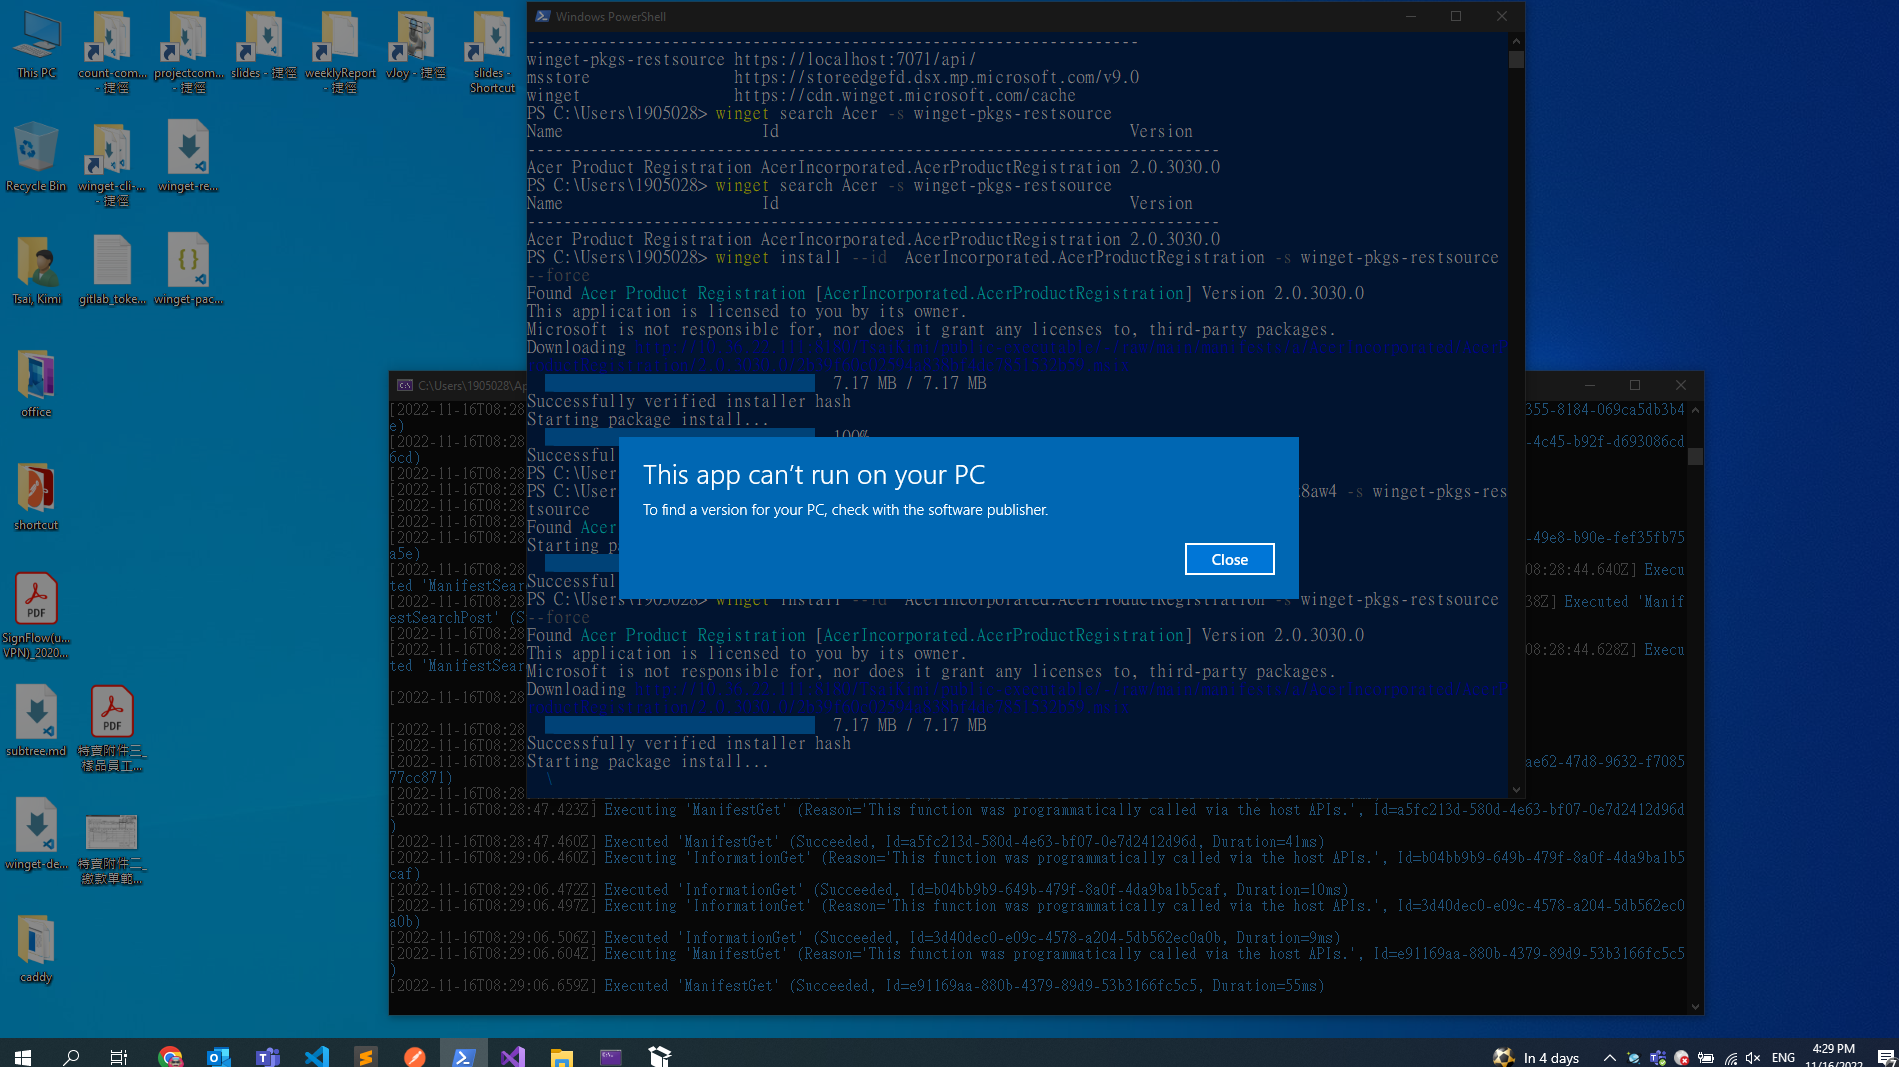
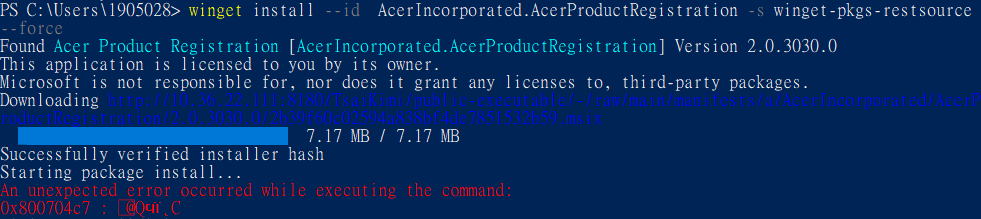 YAML的執行檔格式會跟實際的執行檔做驗證, 如果不匹配的話, 會跳出錯誤: This app can't run on your PC
InstallerType 要跟 InstallerUrl 的檔案匹配
InstallerSha256 也要跟 InstallerUrl 的檔案匹配
YAML的執行檔格式會跟實際的執行檔做驗證, 如果不匹配的話, 會跳出錯誤: This app can't run on your PC
InstallerType 要跟 InstallerUrl 的檔案匹配
InstallerSha256 也要跟 InstallerUrl 的檔案匹配
curl --location --request POST 'https://localhost:7071/api/packages/AcerIncorporated.AcerProductRegistration/versions/2.0.3030.0/installers?code=<API Key>' \
--header 'Version: 1.1.0' \
--header 'Windows-Package-Manager: winget-cli-restsource-dev' \
--header 'Content-Type: application/json' \
--header 'Accept: application/Json' \
--data-raw '{
    "InstallerIdentifier": "prodreginstallers.x64",
    "InstallerSha256": "B95069BC4B6494E942DA6D61A05E046CAABF4565FCC54A6A170CA6682728A30A",
    "InstallerUrl": "http://10.36.22.111:8180/TsaiKimi/public-executable/-/raw/main/manifests/a/AcerIncorporated/AcerProductRegistration/2.0.3030.0/2b39f60c02594a838bf4de7851532b59.msix",
    "Architecture": "x64",
    "Platform": [
        "Windows.Universal"
    ],
    "InstallerType": "msix"
}'
Workaround
- Checkout branch to
release-v1.1.2021110 - Open
src/NuGet.configfile and add<add key="api.nuget.org" value="https://api.nuget.org/v3/index.json" />after<add key="winget" value="https://pkgs.dev.azure.com/ms/winget-cli-restsource/_packaging/winget/nuget/v3/index.json" />
Article
- Github : build error #162
- GitHub : Fresh project clone build fails #148
- GitHub : Restsource nuget repo error #129
- Package manager cannot find package in offline resources
- There are no versions available for the package
- Missing dlls and missing files in new released Microsoft Portal On-premise source code.
Reference
- https://docs.microsoft.com/en-us/windows/package-manager/
- https://github.com/microsoft/winget-cli
- https://docs.microsoft.com/en-us/training/modules/explore-windows-package-manager-tool/?WT.mc_id=AZ-MVP-5004737
- https://serverfault.com/questions/1098513/how-do-i-host-a-private-winget-repository-on-an-on-premise-server
- https://github.com/microsoft/winget-cli-restsource
- https://docs.microsoft.com/en-us/training/modules/explore-windows-package-manager-tool/7-host-your-own-repository
- Github : microsoft/winget-cli-restsource
- 包管理器 WinGet Chocolatey Scoop
- 安裝並使用 Azure Cosmos DB 模擬器進行本機開發和測試
- Hosting your own WinGet private repository
- Adding a package to your private WinGet.RestSource feed using its API
- .NET SDK
- Winget: Install multiple apps